When it comes to building, designing and optimizing your eCommerce store, your product pages could be making or breaking your online sales. Whether your traffic is coming from store browsers, search engines or digital ads, your product pages are what is standing between them and your checkout.
A good product page is informative, well-designed for user experience and well-optimized for search engines to ensure your pages are not only found, but convert more potential shoppers once they get there. They are also appealing to customers, as we learned from our Online Store Feedback Post when we asked you these three questions:
- Have you includes a size chart in your product pages?
- Are your product photos attracting or repelling potential customers?
- Do your product descriptions speak to your audiences, without giving up on brand voice?
In this post we will look at the two key components
- Product page design
- Product page photography
and give you all the tips on how to create perfect product pages for conversions you need to take your store to the next level.
Let’s jump in.
Perfect Product Page Design
A good product page should be designed with your ideal shopper in mind: user-friendly, clear of clutter, easy to navigate, and lastly but most importantly, highlight the products you wish to sell. Things like size and color selection, prominent navigation buttons, and easy-to-read information all add to user experience and will ultimately lead to more clicks to baskets.
Bonus Content: How to Add Size Charts to Shopify Product Pages
A good example of a well-designed page that includes all of these things and more is from eCommerce giant Uniqlo.
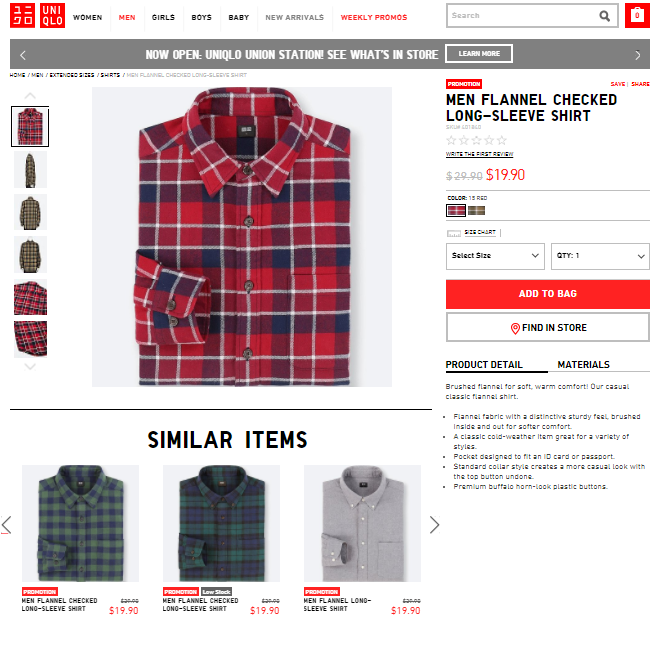
They have everything a good product page should include – related items to upsell and further market – within their product pages. From a more technical point of view on product page design, optimization for SEO and mobile is impressive. Why? Let’s look at the stats.
Perfect Product Page Mobile Optimization
62% of US smartphone users have bought online through their smartphone in the last six months. This means that they are looking at product pages on their mobile, and you should make sure that mobile versions of your product page images are front and center, and additional info is available in tabs: accessible but not taking focus away from the product. Mobile users read less and expect quick access to what they are looking at, which means images are key.
Here is the mobile version of the Uniqlo example shown above.
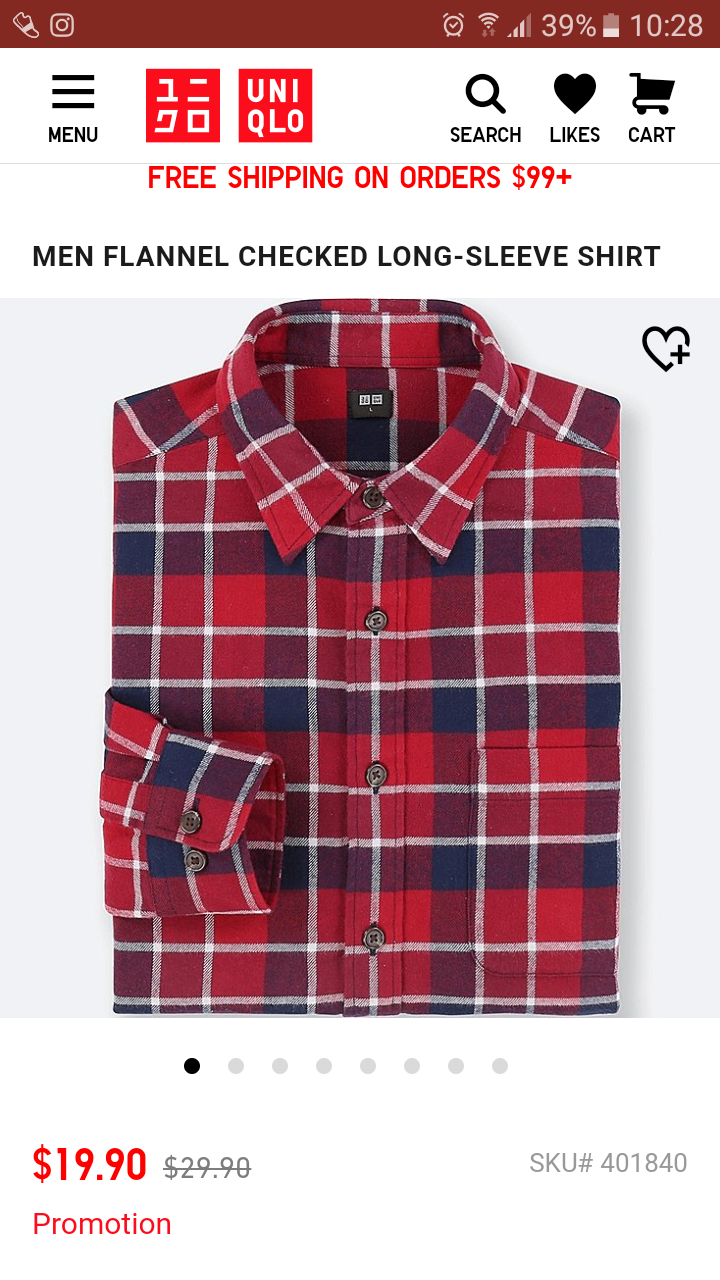

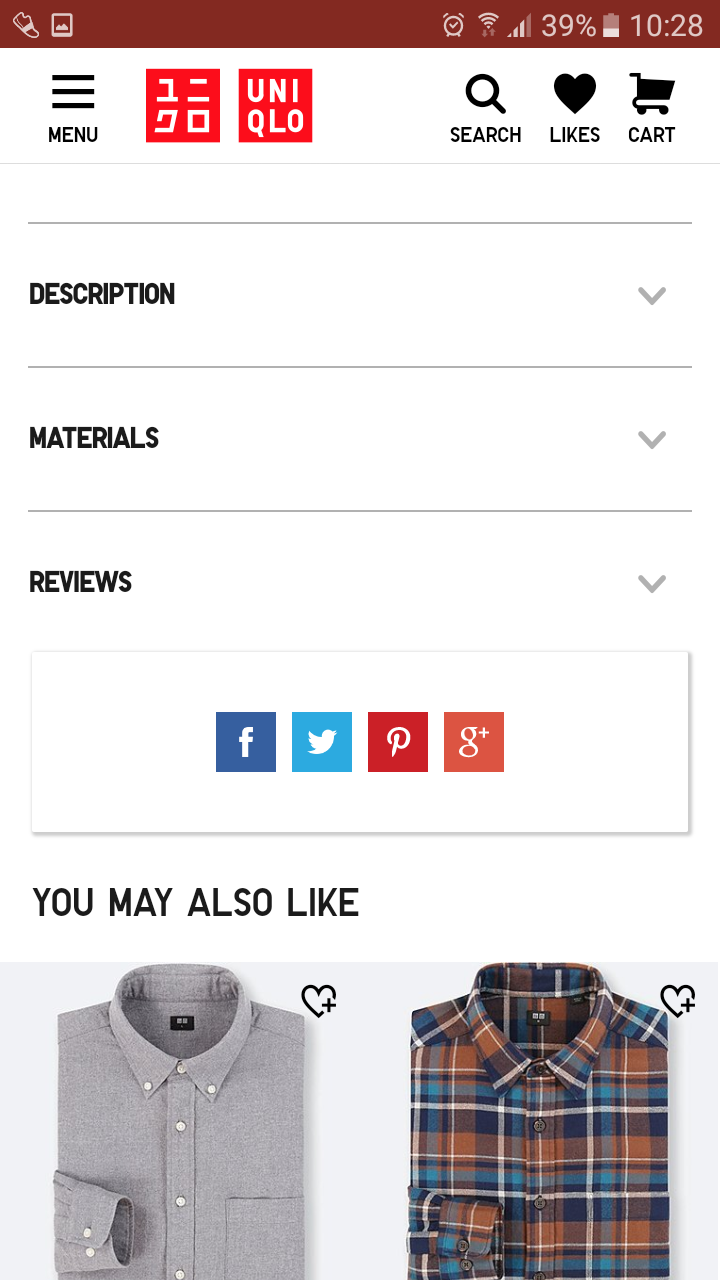
Their mobile pages are fast to load, have fixed menus, and clear positioning of images to ensure they are easy and user-friendly to navigate from a potential shopper’s phone. Here are some key points your mobile product pages should follow:
- Large, clear images
- Tabbed boxes for relevant info and descriptions so they don’t overpower mobile product pages
- Large, clear CTA (call to action) buttons
- Easy navigation
Perfect Product Page SEO Optimization
SEO optimization is very important when it comes to product pages as they play a big role in getting your store ranked. When searches are looking for something specific, it’s your product page, not your homepage, a shopper wants to see first. A well-optimized product page has:
- A meta description that is inviting, concise and relevant
- A good headline that focuses on product titles
- A unique, well-crafted product description that clearly outlines the product shoppers would be buying, aimed at the shopper, not the search engine
- Alt-text for all your product images
- And lastly, speeding up your site and image load time will not only keep your shopper on your site but therefore also help with SEO
Bonus Content: 6 Steps to Writing Product Description that Sell
Pro Tip: Speed Up Your Site Load Time
Your product photos are a big influencer of your site’s load time. The more slowly your site loads, the more frustrated a potential shopper will get, and the more likely they will jump off your site to the next possible search. This ultimately affects your bounce rate and therefore your SEO ranking.
By resizing your images before uploading them you can speed things up. You’ll want to:
- Crop images so they fit exactly to the size of your product image displays
- Choose JPEG formating over PNG, and stay away from TIFF and BMP files
- Shopify recommends keeping your product images under 70kb
Perfect Product Page Images
Your product images are vital in turning store browsers into store shoppers. Your product images should be consistent (all looking the same) and have the same ratio (size dimensions). There are 3 key features to good eCommerce product images. I will outline each of them below.
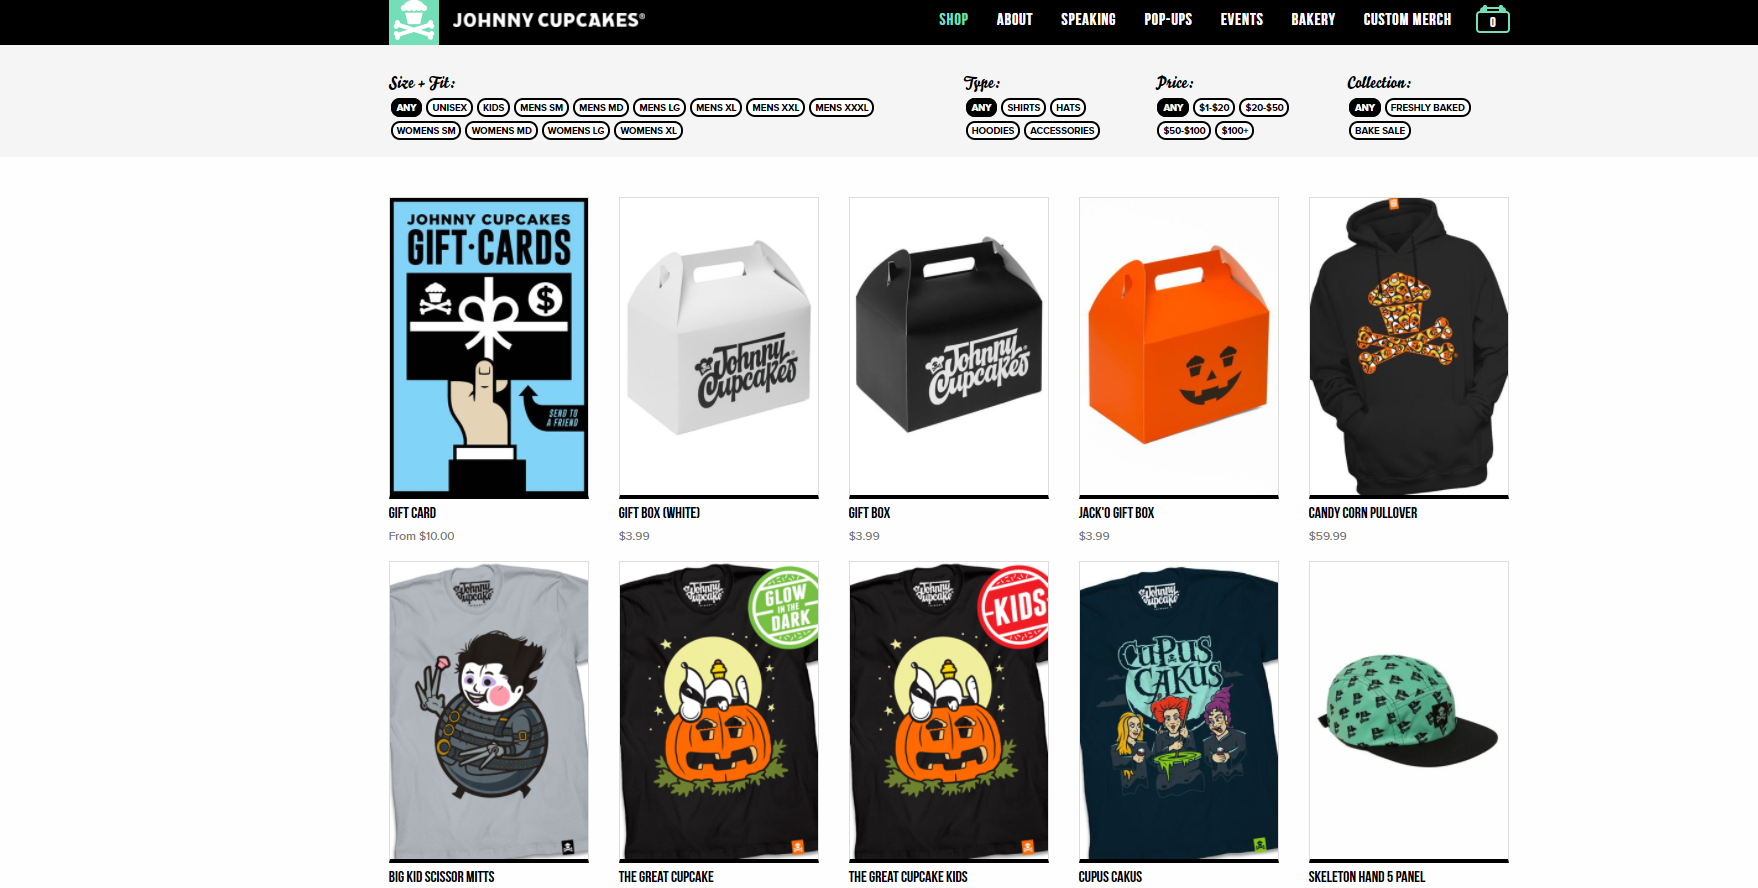
1. Use Multiple Images
Imagine you are at your favorite retail store. When you consider buying a product, what do you do? Do you pick it up, view all the angles, read the labels, imagine yourself using or wearing the product?
Most consumers will do most of that, which is why when it comes to online shopping where shoppers have to rely on images to enable them to imagine all that, one image may not be enough to convince them.
You only have to visit Amazon to see how effective this is.
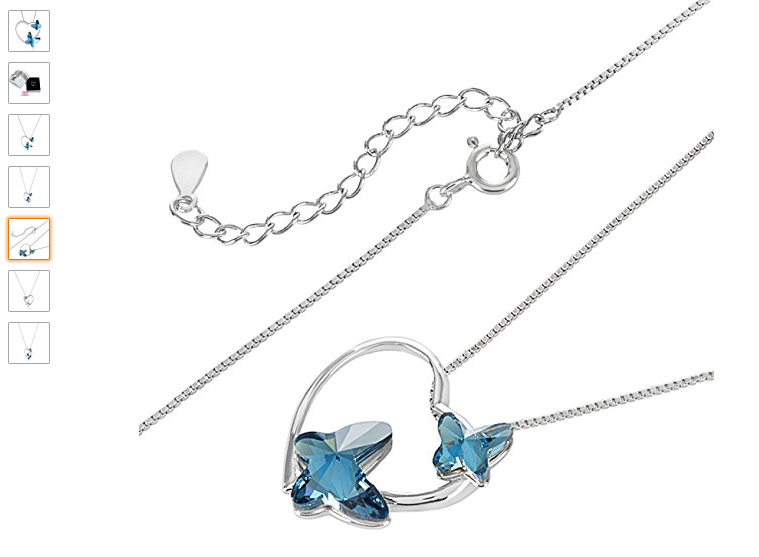
[Source: Amazon]
Bonus Tip: Use video to one-up your competition and give the user a full multi-image experience.
Here’s a step-by-step guide on loading video to your Shopify product pages:
2. Use Good Product Image Photography
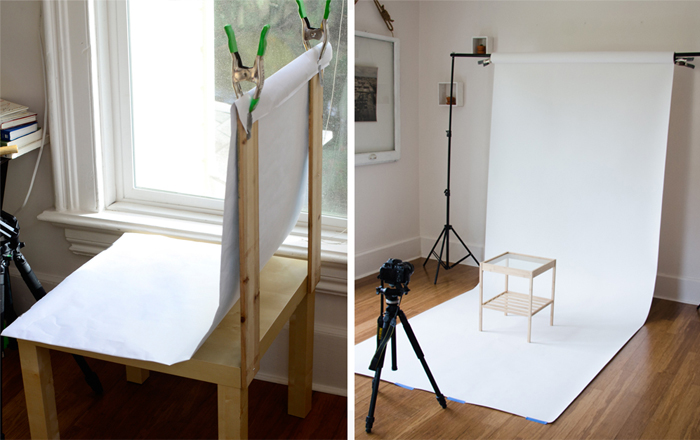
You don’t need fancy equipment to get great shots of your products; it can be as easy as setting up a smartphone and a tripod. The key to great photography is consistency, lighting, and a good backdrop.
Let’s discuss each.
Product Photo Lighting
The ideal product photo will have consistent, good lighting. For new store owners with minimal budget, you can take advantage of natural light. You can do this by:
- Taking advantage of the brightest times of the day (late morning to early afternoon) to ensure you have sufficient light
- Not placing the product behind the light source so that you’re shooting into the light, and therefore avoiding silhouettes
- Ensuring you shoot all product photos at the same time of day to ensure the lighting is constant
- Making sure you don’t have shadows over your products by avoiding windows with blinds or bars or taking note of shadows caused from trees, etc.
- Not placing products in direct sunlight and instead using mirrors or white paper to direct light to your product on all sides.
For the more advanced photographer, here’s a video how-to guide outlining the above to inspire your next shoot.
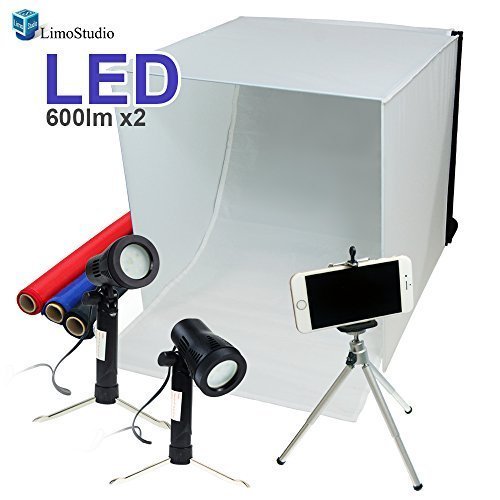
Pro Tip: If you have the budget, consider investing in popular compact light box for as little as $50.
Product Photo Backdrops
The key to choosing your backdrops is to ensure they are consistent. White backgrounds are your best option as they make for easy editing, distribute light more evenly and are easier to find. Photo expert PIXELZ gives 3 DIY backdrop suggestions: white sheets, paper or walls.
Bonus Content: Visit our Product Photography Tips and Tricks post for all the hacks you need to take good product photos on a budget.
Product Photo Consistency
As we mentioned, consistency is key with product photos. Consistency in lighting, backdrop, style, product page placement and dimensions is vital. We have touched on most of these points above except for the latter: dimensions.
Product templates will ensure that all your product images have the same dimensions and scaling. By scaling I mean that the white space around your product is also consistent for your products. You can do this by utilizing free design programs like Canva. Here’s an example of one I created in just ten minutes.
Step 1: Create a custom template based on the dimensions of the product photo you’re creating the template for.

Step 2: Click on ‘Layouts’ and select ‘single image.’ After that you can resize and move the image to the border you want.
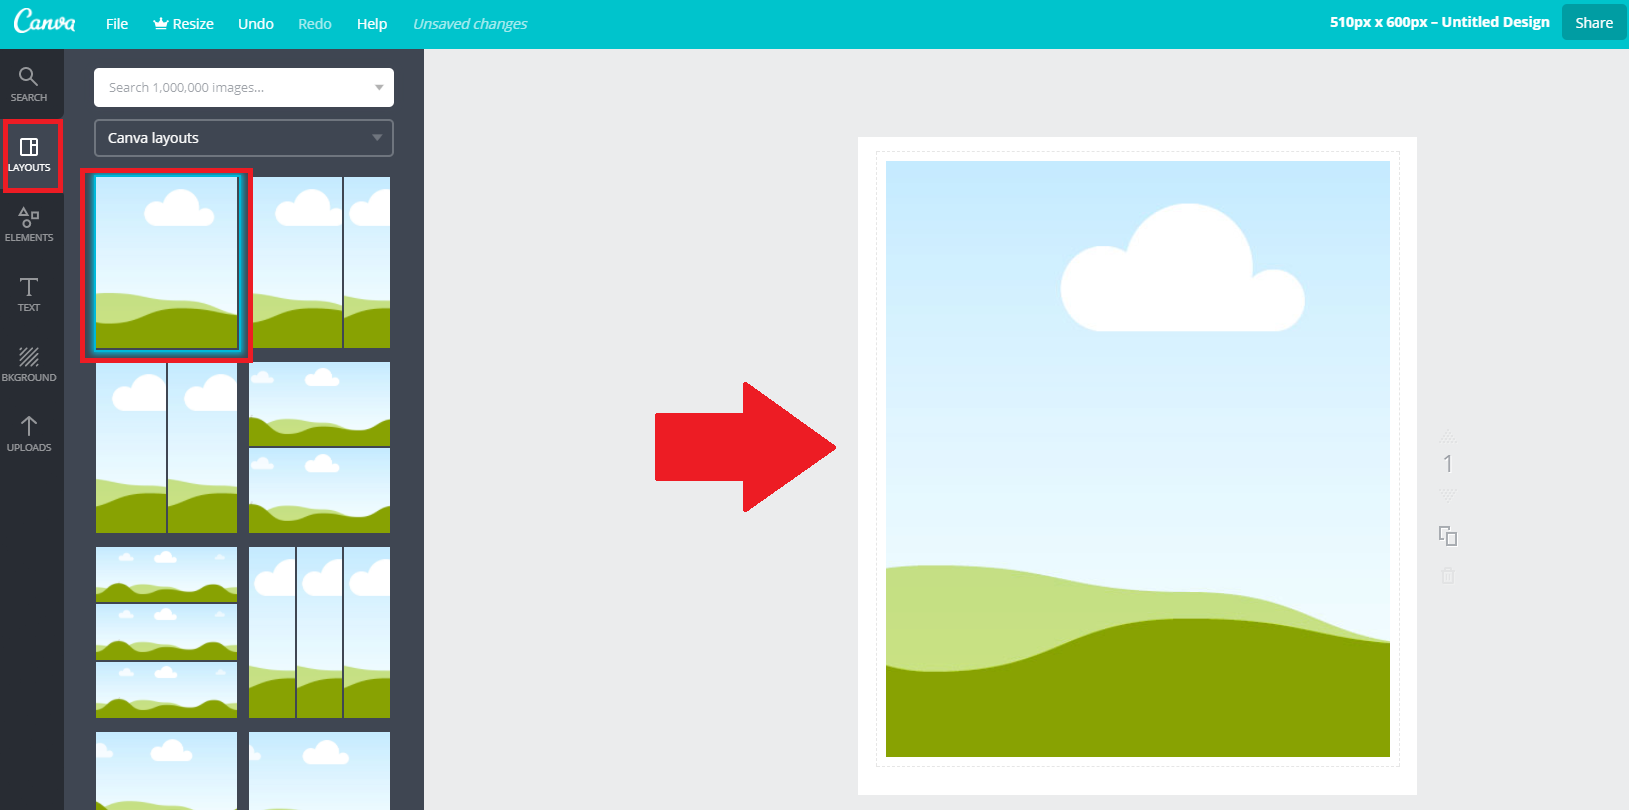
Step 3: Insert your product photos into the block.

Now you can ensure that every photo will have the same dimensions and white border for each product category like the Shopify store example below:
As you can see, editing is as important as the actual photo. In the next point we will dig deeper.
3. Product Photography Editing
This brings us to the final photography point to discuss: product photo editing. When we talk of editing we are not just talking about fixing the dimensions or sizing them correctly for site speed as mentioned above, but also the ability to crop, fix lighting and color issues, changing backgrounds, etc.
According to our 9 Tools You Can Use to Edit Your Own Product Photos post, here are the top editing functions you will need:
- Leveling
- Cropping
- Erasing
- Color Adjustment Tools
Free photo editing software, like the above-mentioned pixelz, means you can make those winning tweaks without blowing your budget to hire a professional. Here’s their DIY editing guide to get you started.
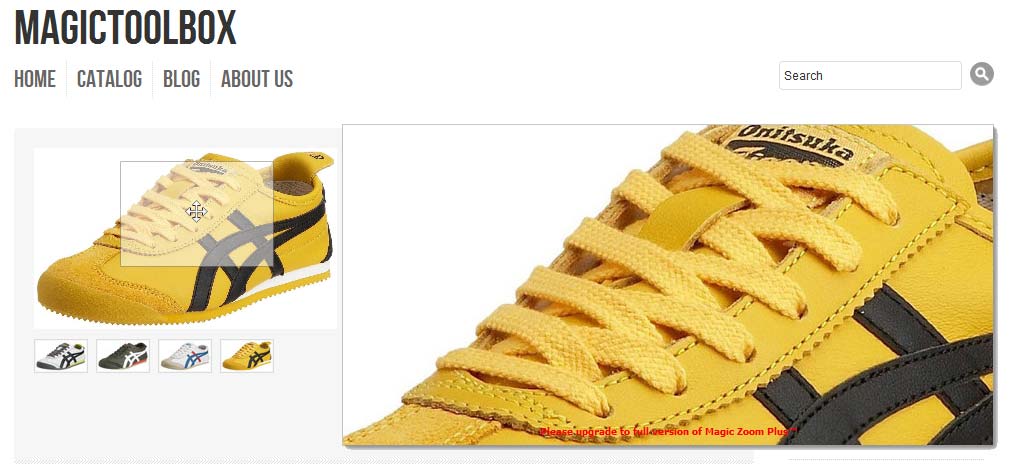
Pro Tip: How to Optimize Your Images for Zoom
A lot of large and medium eCommerce stores optimize for image zoom as this will allow your potential customers to get a great view of your product. To do this, you will first want to make sure that your different images follow these size specifications:
-
Thumbnail – 50px x 50px
-
Collection image – 100px x 100px
-
Related image – 150px x 150px
-
Main photo – 500px x 500px
Then, you will want to ensure that your eCommerce platform is set up for image zoom. If it isn’t, you can do this by installing third-party apps such as Shopify’s Magic Zoom plus.
Perfect Product Page Copy
Finally, once your pages are optimized and your product photos are taken, edited and uploaded, it is time for the last check: product page copy. Your copy should clearly state what your product is, what problem or pain point it solves, why they should choose it and what it is made of. We have mentioned it throughout this post, but here the four main points you should be reviewing and optimizing:
- A good, clear title/headline
- A CTA button
- A description that answers what it is, how it’s made, and why they should buy it
- Including all relevant info like instructions and how-to guides to show you’re a niche expert
Wrap Up
You now have all the tools on how to create the perfect product pages for your store. Have questions? Post them in the comments below.

Nicole is a content writer with over sixteen years experience and flair for storytelling. She runs on a healthy dose of caffeine and enthusiasm. When she's not researching the next content trend or creating business content strategies, she's an avid beachgoer, coffee shop junkie and hangs out on LinkedIn.
Recommended articles
 Facebook Ads for eCommerce: 16 Strategies, Examples & Tips
 How to Build a Winning eCommerce Ads Strategy
 Google Ads for eCommerce: Everything You Need to Know
 10X Your Traffic with PPC Management Software
Comments
Powered by Facebook Comments