Running a business comes along with all sorts of things that I bet you thought you’d never do.
Surprising amounts of sitting, using social media more than your twelve year old child, learning more about taxes than you thought possible.
It’s all part of the job.
So, that being the case, why shouldn’t you know how to take care of one of the biggest aspects of your business – photo editing your product pics!
You already learned how to take super professional product pictures with your smartphone, but what do you do next?
In this post you will learn about 9 different tools that you can use to take your raw photos and make them look amazing!
First Things First – The Very Basics of Photo Editing
Before we can start talking about photo editing tools, it’s necessary to go over a few photo editing tips. Here are the first few things that you should be doing any time you want to start editing a picture.
1. Level out the image in order to make sure that it is completely straight. Depending on the tool you are using you will either be doing this with a ruler tool, or simply by clicking on the rotate button.
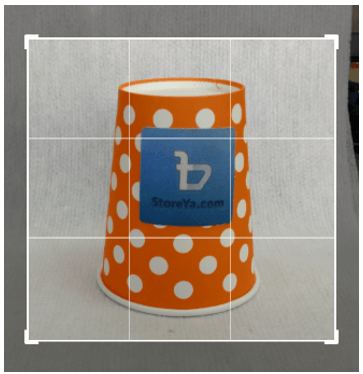
2. Crop the image to get rid of anything in the periphery that shouldn’t be there and to ensure that your subject is the center of the image.
3. Get the color just right. Some tools come standard with an “auto-tone” feature which will quickly set the colors just right. If you don’t have this feature available you can play around with features like “Contrast” (which adjusts the difference between the brightest and darkest colors), and “Saturation” which helps to bring out colors that might not be so visible in a picture.
4. Get rid of imperfections in the photo with brushing out features. Sometimes the lens of your camera will be dirty, and this will result in annoying little specs in your picture. Get rid of these, and your pictures will be much better!
Now, I know that was super basic, but that is really all you need to know in order to get started!
All in One Photo Editors
Let’s start things off by taking a look at some of the biggest, and most powerful tools that you can use for photo editing. Keep in mind though that these tools might be a bit tricky to use too!
1. Photoshop Express
As I’m sure you already know, Photoshop is the big name in the photo editing world. It is one of the most powerful tools out there, and because of that it has become one of the most used tools out there.
But we’re not going to talk about Photoshop today, because it is probably the most complex photo editing tools as well.
Instead, we’re going to look at Photoshop’s little brother, Photoshop Express. While not as powerful as Photoshop, Express can do just about everything you would need when getting started with photo editing.
Express can be used from your computer, tablet, or even phone, it’s free, and it is very intuitive! Here’s an image I edited in the Photoshop Express app.
For those of you wondering about the other Photoshop tools you can also check out Photoshop, Lightroom, and Elements, but keep in mind that these tools are quite advanced.
To Sum Up: Photoshop is super powerful, and its functionality depends on which of the programs you choose (as does the price). For your purposes, Photoshop Express should be more than sufficient.
Free Alternative: If you’re looking for a powerful, free photo editing software then you should definitely take a look at GIMP. It is a great tool, but not that easy to use without really learning the platform.
2. Pixlr
The full Photoshop program is awesome, BUT it has two potential downsides – the price, and the fact that it must be downloaded onto your computer. Pixlr, a shockingly robust free online photo editing tool, solves both of those issues.
On top of that, like Photoshop, Pixlr has a full editor plus an easy to use express editor for quick touch ups and effects!
Using the Pixlr editor is fairly intuitive, and can be learned well enough by watching a few videos and reading some guides. Pixlr has a large library of tutorials too that you can look at.
To Sum Up: Pixlr has a pretty similar feel to Photoshop, but it is all online, and it’s safe to say it’s a bit easier to use. For beginners, and small touch ups I definitely suggest using the Express tool, as it is still packed full of features, but is easier to use.
3. BeFunky
As the name suggests, this photo editing tool isn’t quite like the others. Sure it’s got the regular editing functions, though granted in a toned down version (which is fine, because it makes it less complicated), but it’s got some other crazy features too!
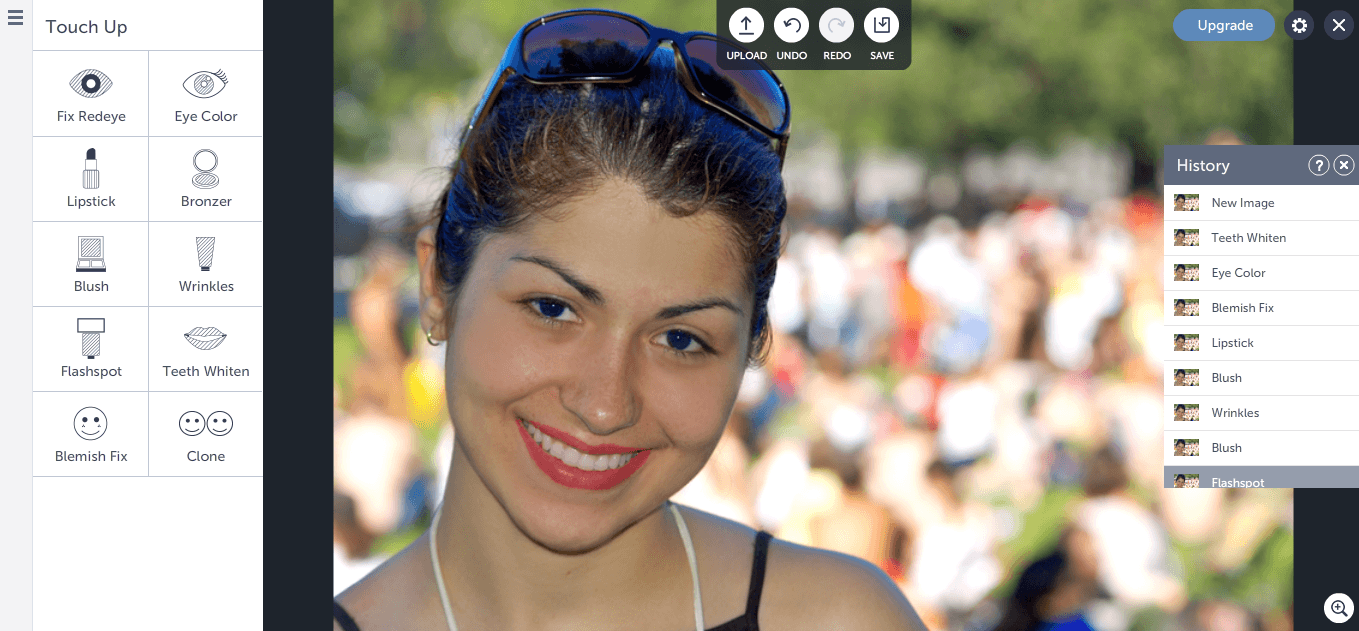
For example, let’s say you have a model in your product picture, you can use BeFunky to add some touch ups:
If you do decide to give this a shot, it is pretty easy to use, but I suggest looking into some touch up tips (or at least ask someone what color makeup to use)!
Below you can see my before and after work:
Anyway, in addition to this, there are all sorts of other wacky (and cool) things that you can do with this tool like adding in text, graphics, and preset filters.
BeFunky is free, with a premium option to unlock more features, and can be used directly from your web browser.
To Sum Up: BeFunky is a really cool, simple to use tool that lets you add in some crazy twists to your photos. If you want to give your product photography some personality, then definitely check out this tool.
Super Handy Tools for Specific Purposes
Sometimes you’re not quite ready to edit a picture in a full-fledged editor, or you don’t quite have the expertise with the tool to do what you want to do.
That’s fine, there are other tools out there to help you with these specific needs!
1. Clipping Magic
Have you ever taken a picture and thought, “gee I’d love to take the background out of this picture”? Well, you can! And you don’t even need technical photo editing knowledge.
With Clipping Magic and a bit of patience you take any product photo and remove the background! That means you can then take that and put it on a background of your choosing, or add it into other images (be careful to make sure it looks natural).
The system is actually quite fun to use!
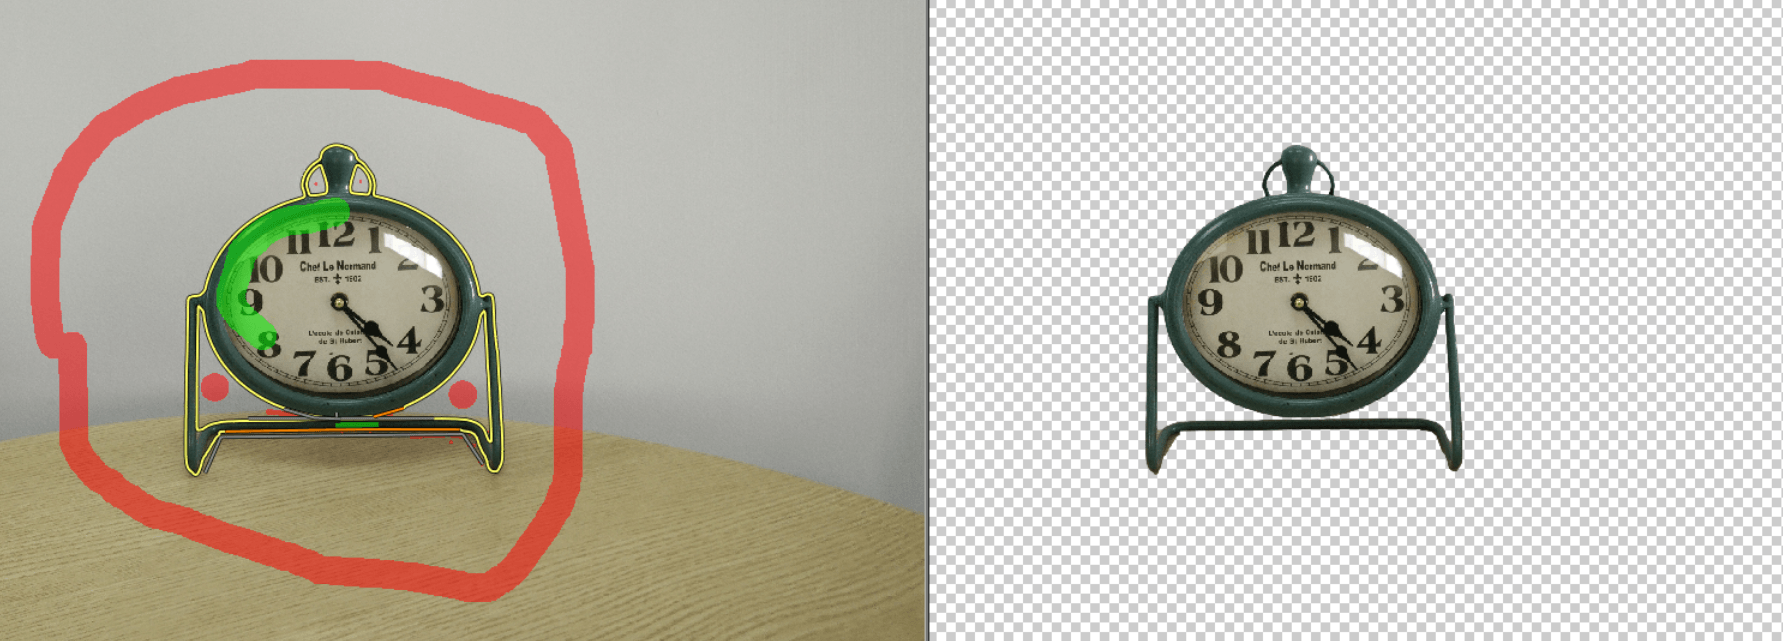
You upload your photo and then tell the system what you want it to keep by coloring it green, and tell it what to take out by coloring it red. The algorithm picks up the general lines of your image and cuts it accordingly. You will probably need to do a bit of fine tuning after the initial cut.
Here’s a picture I did in about one minute. It’s not perfect yet, but for one minute of work it’s definitely not bad! (The left is the original and the right is the background free image).
2. Portrait Pro
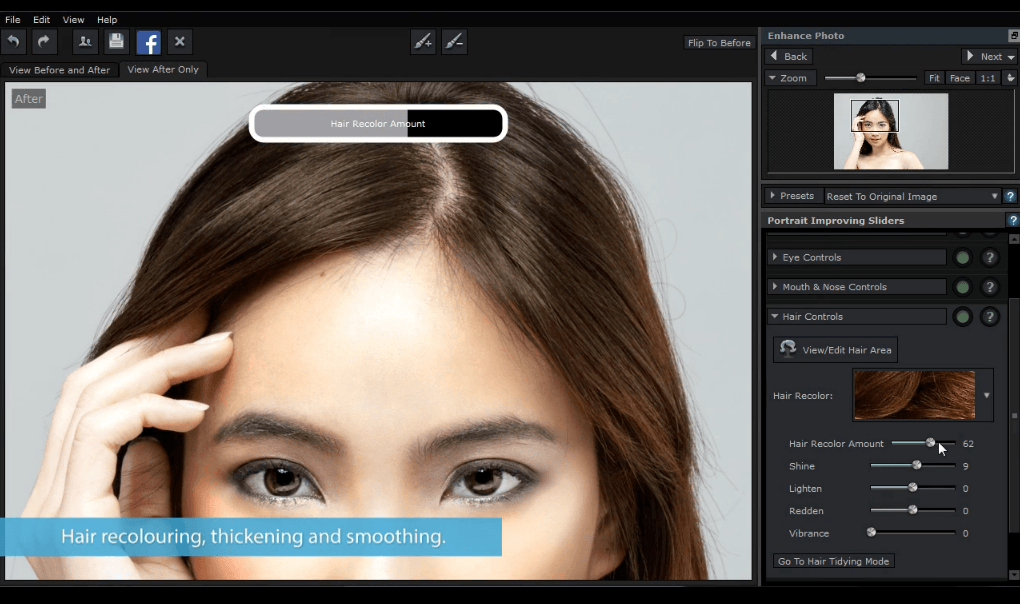
If you frequently use models in your product photos (or in your marketing content), and you don’t want to pay for a professional to do touchups to your pics then Portrait Pro could be just the solution for you.
This tool isn’t like regular photo editing tools. Rather than providing standard editing options, it focuses solely on portraits. That means you’ll be able to do things like change hair color, smooth out wrinkles, and more easily with preset features.
3. Rotary View
This is less of a photo editor, than a tool that you can use to bring your photos to life!
With Rotary View you can take the photos that you take and upload them to your product pages as 3600 degree interactive images.
In terms of the editing itself, you can either do it in one of the previously mentioned tools, or you can use the native editing options in Rotary View itself.
Places to Look for a Little Help
Let’s be honest, sometimes it will just be easier to have someone else help you out here. And that’s fine!
But, when you do go to find someone else, you’re probably not going to want to go and spend all of your money on a freelancer, which is why I will show you these places you can look to find cheap and good photo editing services!
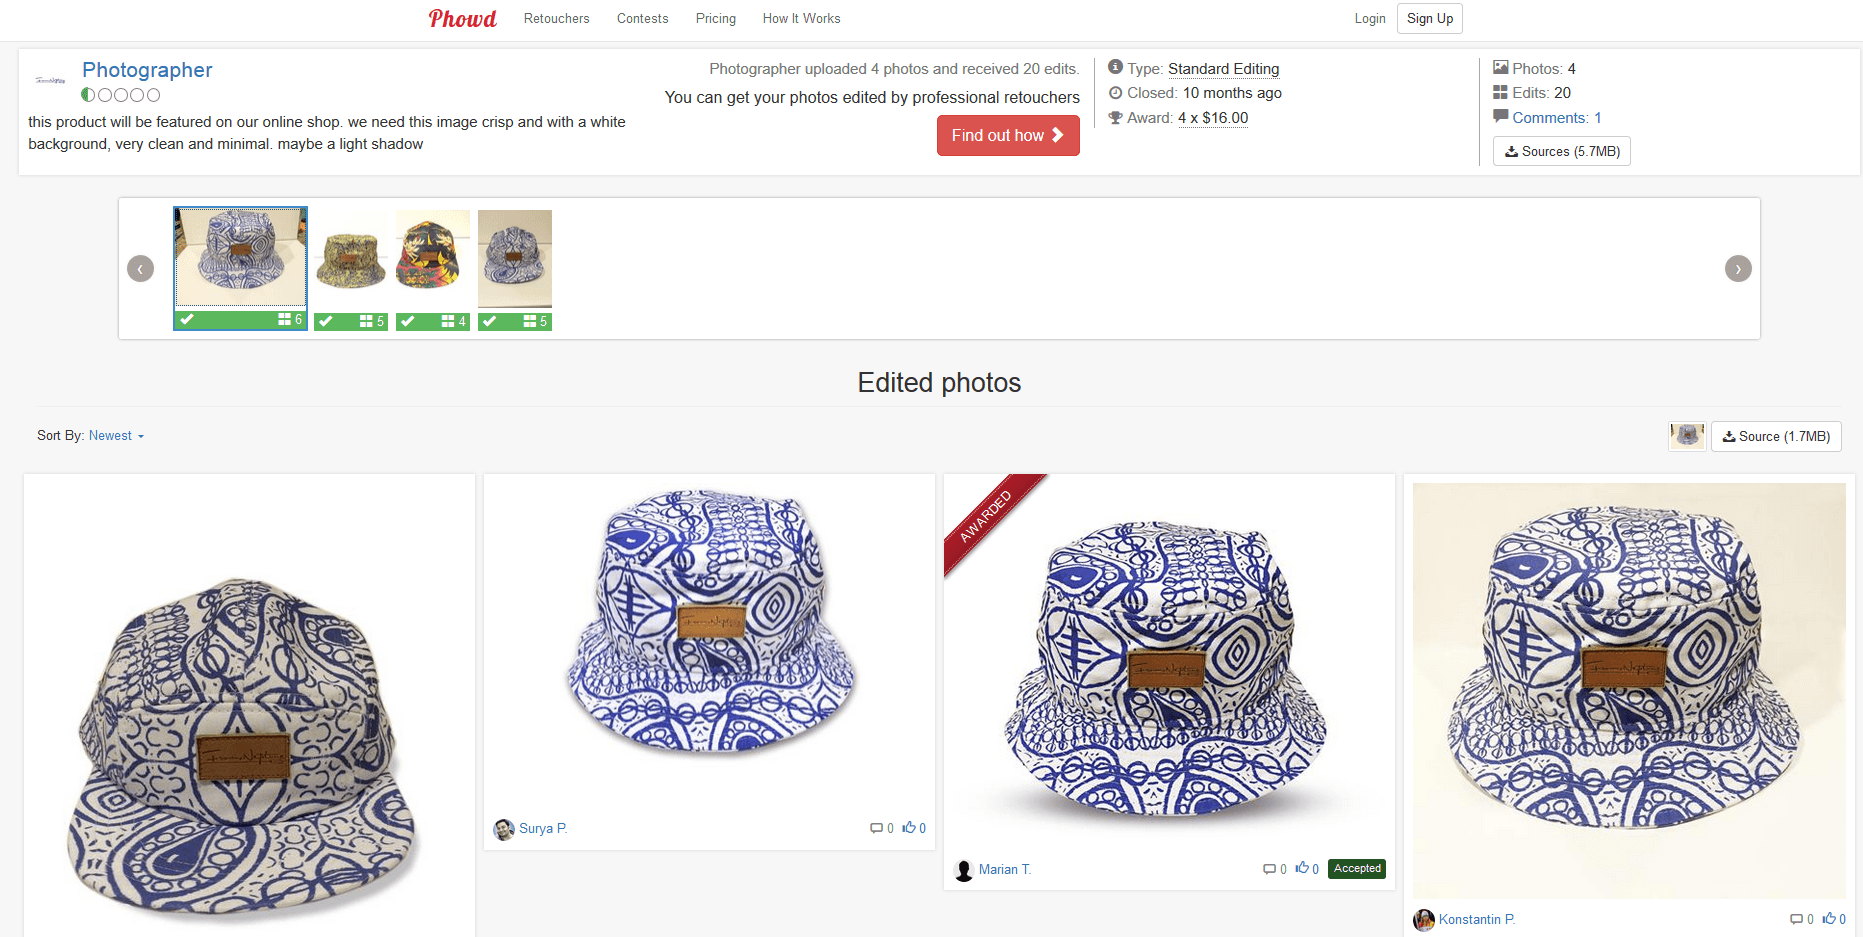
1. Phowd
Phowd is probably one of the coolest (and most fun) ways for you to get your product photos edited. Basically, it is a community of photo editors that are looking for more business, and therefore are willing to compete for your approval!
Here’s how it works, let’s say you have a product photo that you took and you want someone to make it look awesome, then all you have to do is upload your picture to Phowd, and start a contest. This contest will be open to the Phowd community, so all the editors out there can try to create the product photo that most pleases you.
Once you choose a winner you can then remain in contact with the “retoucher” that you chose for future projects.
There are no set prices in Phowd, but there are suggested minimums to work with. Depending on what you need done the prices range from 25 cents to $75.
FYI: The more editing that you do in advance, the cheaper this service will be. So keep that in mind when using it.
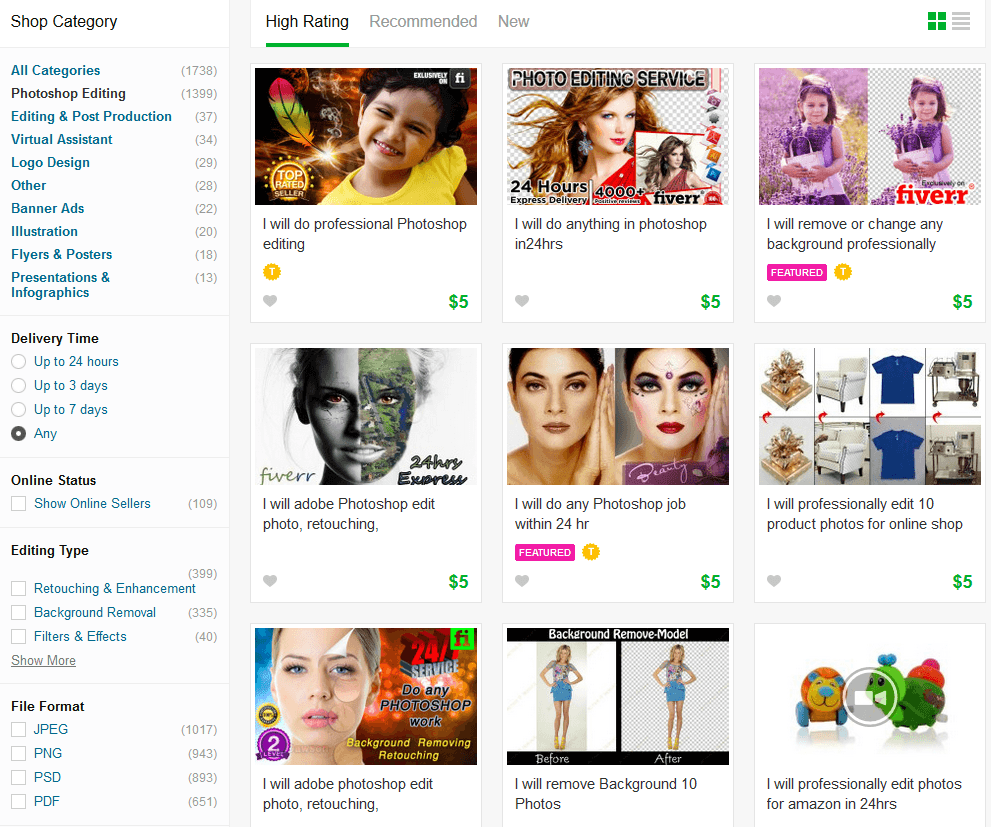
2. Fiverr
I’ve spoken about Fiverr in the past, and I will probably speak about it again, because it is just such an amazing resource.
For those of you that don’t know, Fiverr is an online community of people who will complete tasks for only five dollars.
In this case, doing a simple search for photo editing on Fiverr brings back countless results, which you can filter according to your needs.
If you need something quickly, then be sure to only search for people who will get your edited photo back to you in 24 hours.
3. Pixelz
If you’re not quite sure you want to go with Fiverr for outsourcing your editing there are other cheap options out there, and Pixelz is one of the best.
First of all, Pixelz specializes in eCommerce product photography, so you know that you’re in good hands. Plus, you can manage the entire process from the internet. Send in your pictures, specify the editing you want done, and track the progress of your orders!
The Pixelz team promises fast turnover and satisfaction guaranteed. Plus they claim the ability to process thousands of pictures in a day (should you need that).
This service costs $1.45 per picture.
Go Ahead and DIY
Now that you have the tools at your fingertips, it’s your turn to start doing some editing! Play around with these tools, find the one you like best, and go for it.
Which tool do you use in your business? Which is your favorite? Are there any tools we missed? Let us know in the comments below!

Zack is a social media enthusiast who loves all things digital. He is the inbound marketing manager at StoreYa where he spends his days searching for the newest social marketing scoop. If you’d like to chat with him, feel free to connect with him on any social platform.
Recommended articles
 Facebook Ads for eCommerce: 16 Strategies, Examples & Tips
 How to Build a Winning eCommerce Ads Strategy
 Google Ads for eCommerce: Everything You Need to Know
 10X Your Traffic with PPC Management Software
Comments
Powered by Facebook Comments
