Whether you are a web designer, a marketer or a just an owner of a small business you know how it’s like to be dealing with images on a daily basis. Usually, it’s all familiar tasks such as resizing, cropping and retouching images. In this case, you can easily use your phone camera or a built-in image editing tool on your PC. However, once you continue to work with more products you’ll want to make much more than just simple retouch with your images.
Take for instance Packshots for a new catalog. One of the most common tasks you’ll encounter with these is making a plain white background, which you might need for your online store. This is where a bit of work comes in.

If you’re still new to Product Photography go ahead and read my earlier posts on Product Photography Tips and Tricks and How to Take Amazing Product Photos With Your Smartphone.
Now, making the background white or transparent (in case you want to use your image layered elsewhere and believe me you will), may seem a bit complicated for those of us coming from the nondesign background. Well, I’ve got good news for you! It doesn’t need to be! Today we’ve got plenty of both online and offline options that will let you do anything with your backgrounds without any knowledge of specialized software such as Photoshop or GIMP.
The following tools can be a great alternative, won’t cost you a penny and you’ll be surprised just how easy it can be to edit backgrounds. Afterall, do you really think all these bloggers spend hours learning how to edit their visuals? Nope, they’ve got a couple of tricks up their sleeves and so can you. So, let’s explore that creative zen!
Microsoft Office
Before we start with some of the online options, I want to talk about the most common application nearly all of us have on our PC. That’s right! The Microsoft Office Suit has all
necessary functions you’ll need and is, in fact, a pretty powerful tool, which only gets better every year. You can easily remove backgrounds in Word, Paint, Publisher or PowerPoint.
All 4 work nearly identically and follow the same route. I’ll take PowerPoint as an Illustration.
How does it work?
To Remove a background:
- Insert an Image
- Click on Image > Select Remove Background (Under File in PC or Adjust on a Mac)
- Use a marker to make any adjustments around your object or Mark Areas to Keep tools.

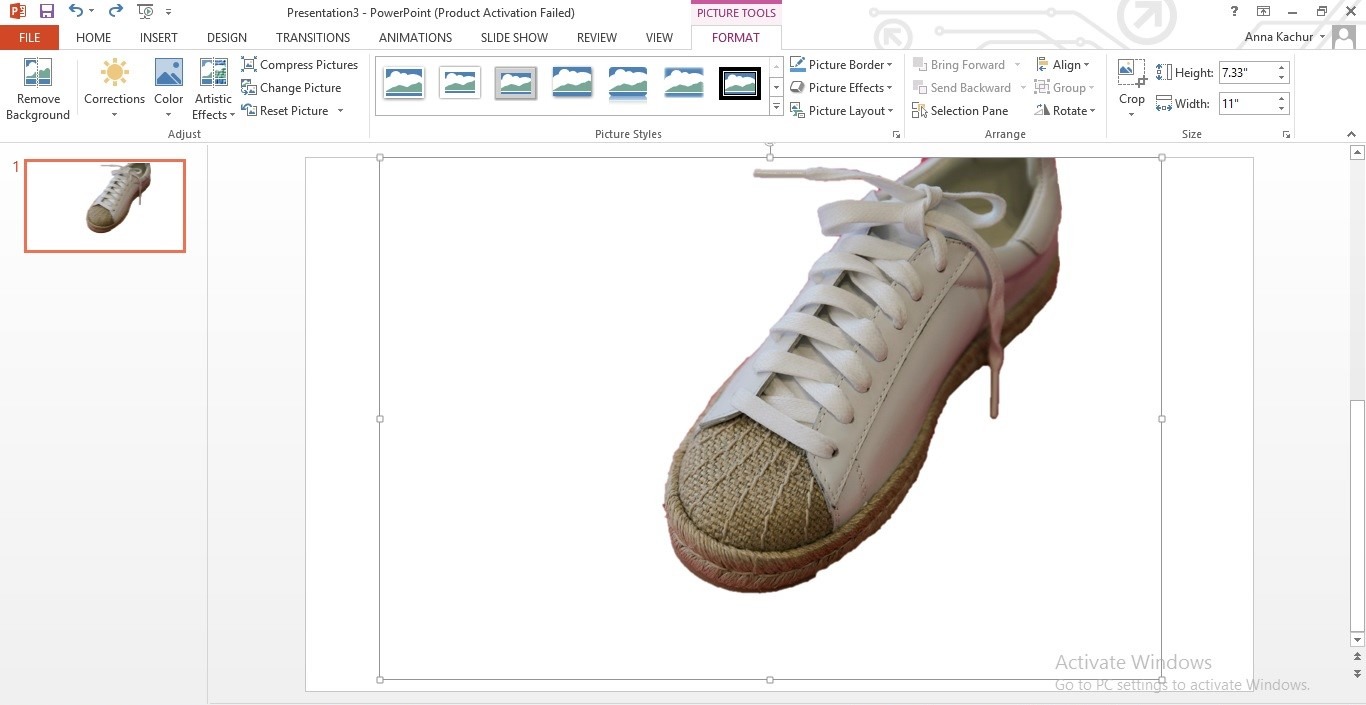
What’s really handy about working with Microsoft Office applications is that it automatically detects the background that needs to be removed doing most of the work for you. All you’ll need to do is a just a few minor fixes which you can mark with a pencil and crop out later.
The only thing to keep in mind though is you’ll need to be using Office 2010 or later to have this feature.
To Make the Background Transparent:
- Click on the image
- Go to Format Tab>Adjust Group>Recolor
- Set Transparent color and click on the background to Remove it
Unlike the earlier, this feature is available in Microsoft Office 2007. The only downside might be is that it doesn’t work for multi-colored backgrounds. Not to worry, though. Just go back to previous steps, make it white and then continue with your image.
Pricing: Free if you’ve got MS Office on your computer.
Now let’s move on to some popular online options.
There are dozens of good free editing tools out there today, but which one is the easiest and doesn’t require to much time to master. I’d like to show you two that I’m an all time fan of. PicMonkey and Pixlr. These are super handy for a quick edit and background removal. On top of basic cropping and resizing they have tons of filters you can choose from and use them to spice up your images. These two tools will definitely get you to reveal your creative spirit.
PicMonkey
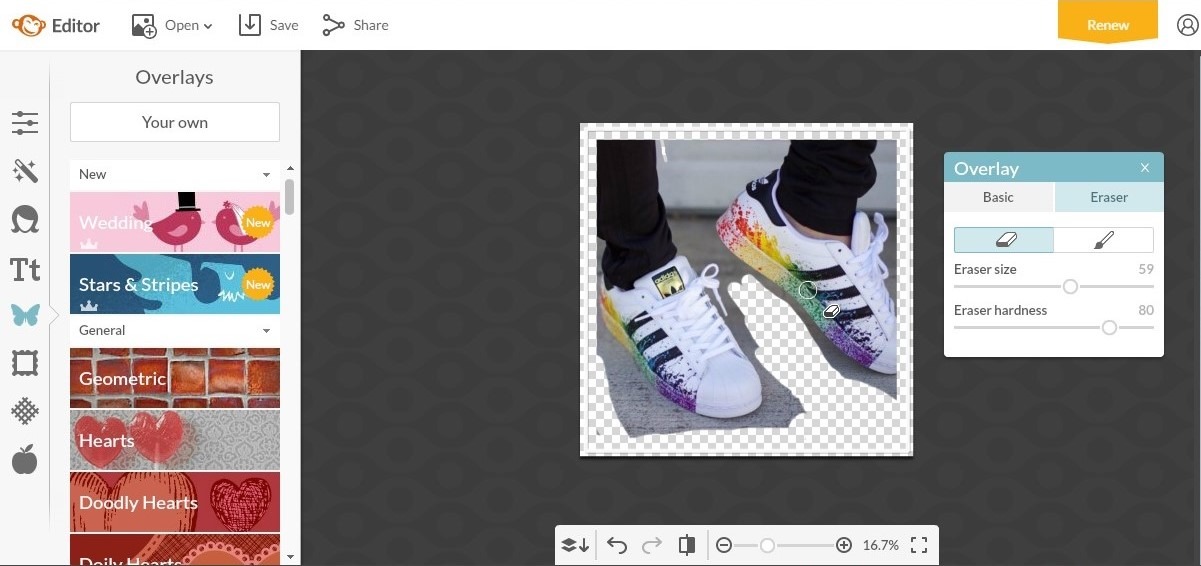
I absolutely adore PicMonkey. It’s fun to use and you don’t need to know anything about photo editing to come up with some really great results. You can do pretty much anything with it from removing backgrounds and replacing them with some really groovy designs to getting rid of wrinkles and even adding a spray tan effect on your photos. Unsurprisingly it is a favorite tool for bloggers. If you can’t afford Photoshop, it’s a perfect alternative.
How does it work?
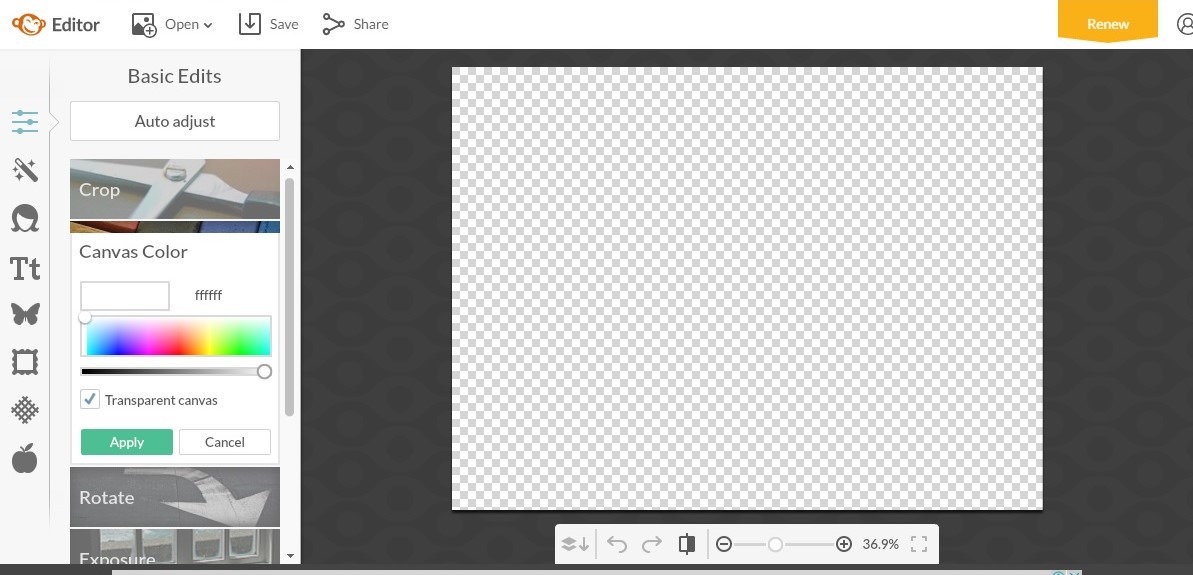
- Create a blank Canvas in PicMonkey
- Make the canvas transparent
- Go to Overlays Menu > Select Your Own > Download the image.
- Remove the background you don’t want using an eraser and Save your image.
Pricing: Free for basic tools (which is a lot) and $3.33 per month for a more advanced package.
Tip: If you’re a dedicated Google user, I’ve got great news for you. The beauty of these apps is you can create an extension on Chrome, so when you receive email attachments, you’ll get an option to preview the image directly in Pixlr Editor or PicMonkey. Thus you can start editing the photos or make quick adjustments on the spot, saving you some serious clicks.
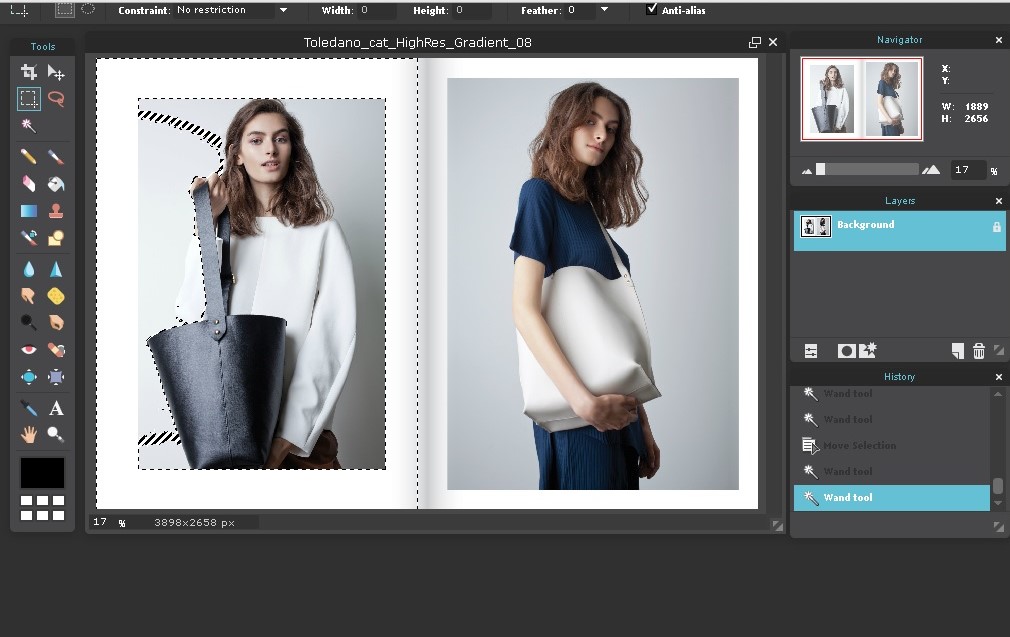
Pixlr
This one is by far my favorite. Pixlr is not as easy to use as PicMonkey in the very beginning. However once you start, you get a hang of it and realize what an invaluable tool this is. I highly recommend this App for any purpose, from removing the background to creating carte blanche images. You’re going to love its interface, it’s amazingly intuitive and you can customize it completely to your editing needs. For me personally, it takes about 3 minutes to make the background transparent and make any necessary adjustments.
How does it work?
- Select the Magic Wand and click on the area you want to keep
- Hold down the shift key to add more areas
- Press Delete or Cut from the Edit menu to delete the selected areas.
Finally, there are two more Online tools that I would like to mention. They may cost you a few dollars, but they are well worth the price. If you want to quickly remove a background in literally a few clicks, these are great.
Clipping Magic
First and foremost let me introduce you to Clipping Magic. This is by far the most popular cloud-based tool when it comes to removing backgrounds. It is super easy to use and gives you pretty decent results in a just a few clicks. There is also an option for bulk processing, allowing you to clip several images together and remove backgrounds simultaneously.
How does it work?
- Mark the foreground using the Green tool (areas you want to keep)
- Mark the background using the Red Tool (areas you want to delete)
- Zoom in to inspect the result and apply any minor corrections. (You can use Scalpel to refine some of the troublesome edges)

And just like magic, you got yourself a background free image that you can use on top of any graphics.
Pricing: Their package starts with 3.99 per month for 15 images and goes up to $15.00 for 500 images. Pretty good deal, ha?!
Icons8 Background Remover
Icons8 Background Remover is another online tool that easily removes the background from images you upload. The tool ensures a quick and easy process due to AI and a very simple interface with just two main buttons. It’s free, but you need to sign up to use it. Additionally, it doesn’t reduce the quality of processed images, which is the main disadvantage of other similar tools.
How does it work?
- Upload your image (the tool will remove the background automatically)
- Check the processed image’s edges with built-in zoom tool
- Download it, if you’re satisfied with the result
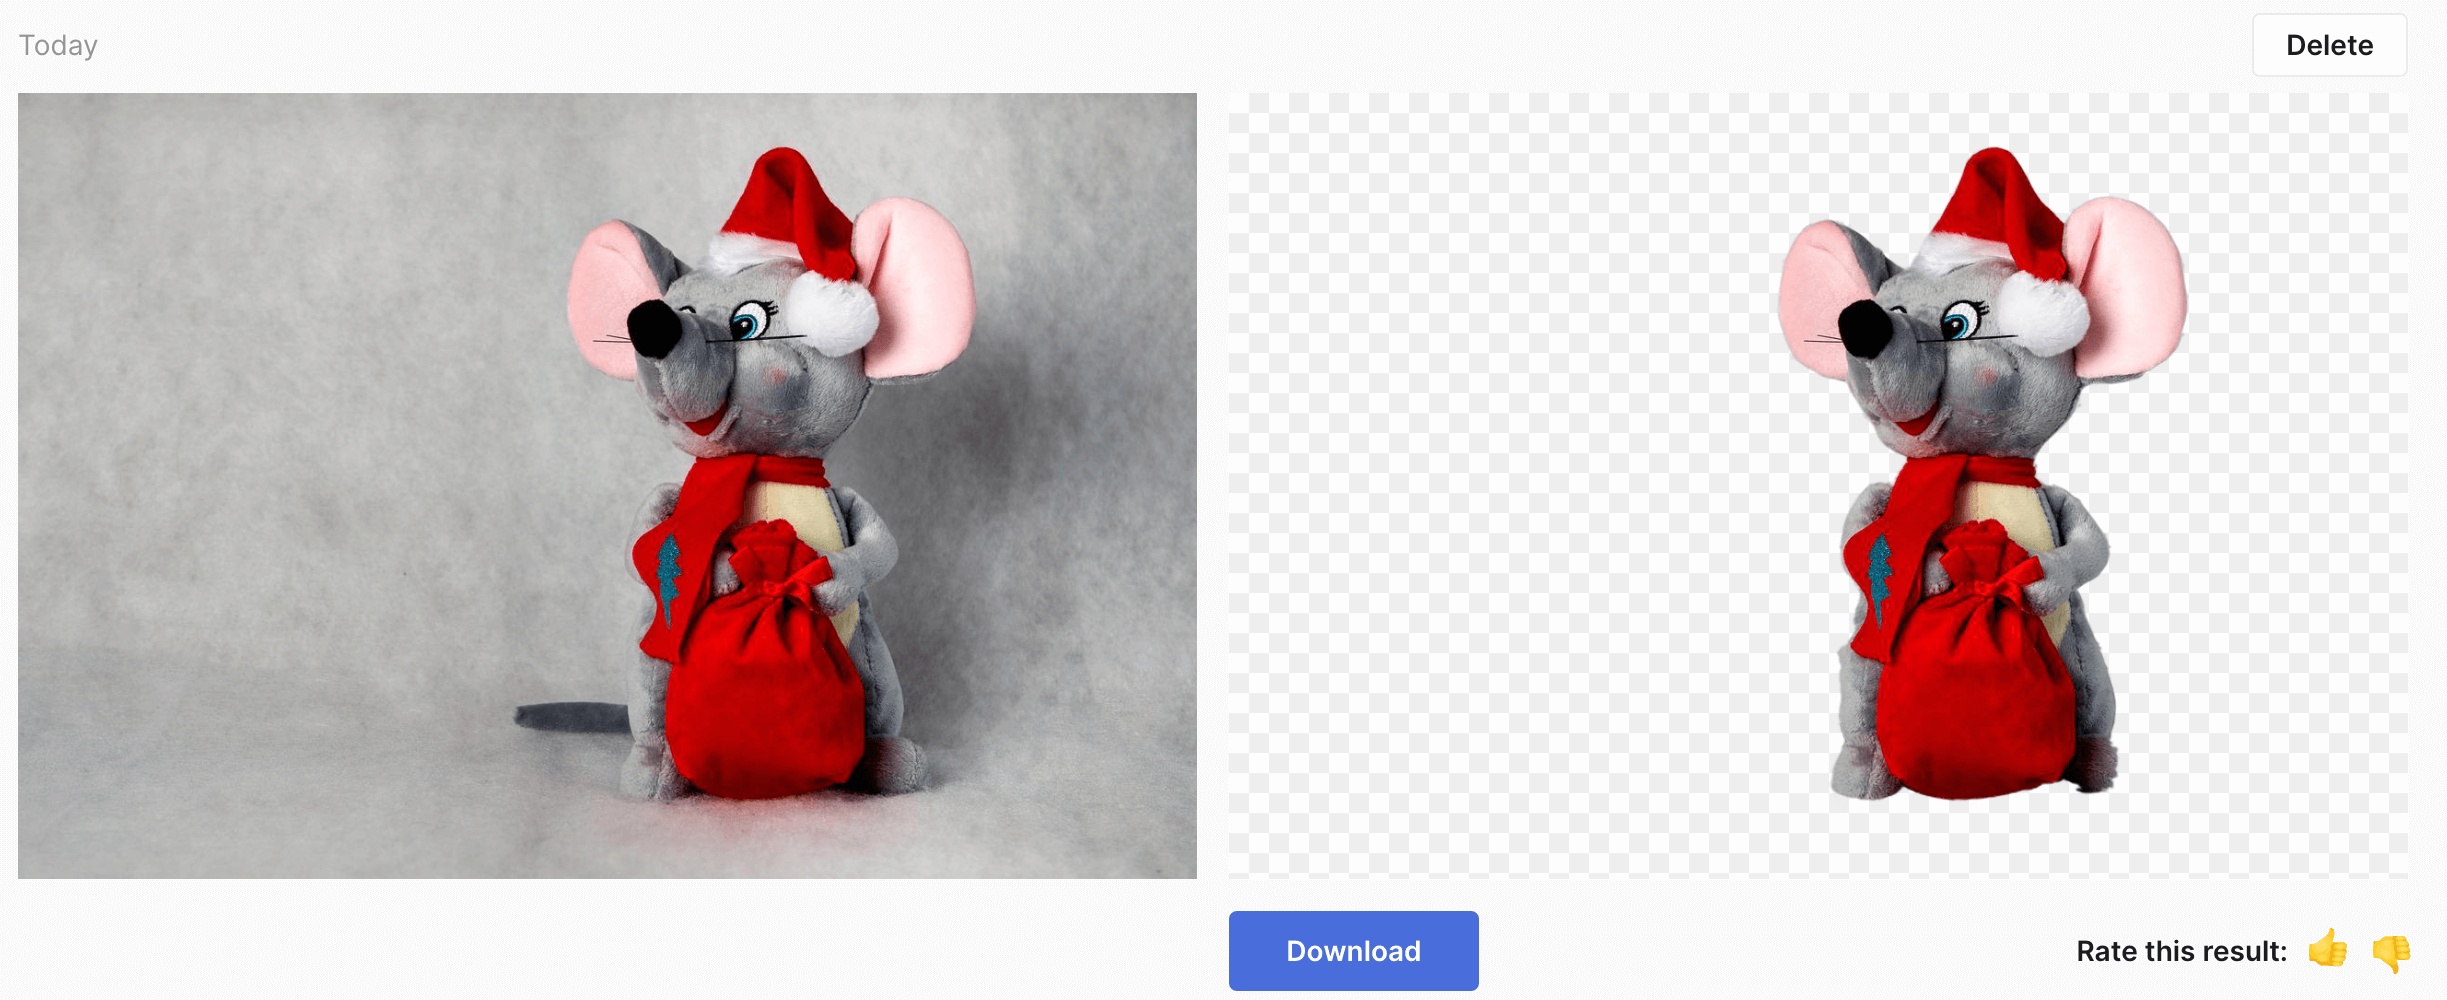
Pricing: free to use, but it’s necessary to sign up to process an unlimited number of images
This is a great tool for both personal users and business owners and creators since Icons8 offers single picture processing and bulk photo uploading opportunities. Moreover, the tool works online, which is why it fits all types of operating systems and devices.
Conclusion
So whatever your goal is: whether you are making a new catalog and need background free images for Amazon or your Online Store, or you’re just playing around with collages and creating marketing material, there is absolutely no need to spend months on mastering specialized software.
Thankfully today there are plenty of options that you’ll find just as good and even fun to use. Good luck and remember – “Simplicity is the ultimate form of sophistication” ! 🙂

Anna Kachur is a marketing enthusiast and the inbound marketing manager at StoreYa. She spends her days searching for the newest social marketing scoop and creating amazingly awesome content. When she's not in front of the computer she loves hiking in the outdoors, exploring new places and meeting new people.
Recommended articles
 Facebook Ads for eCommerce: 16 Strategies, Examples & Tips
 How to Build a Winning eCommerce Ads Strategy
 Google Ads for eCommerce: Everything You Need to Know
 10X Your Traffic with PPC Management Software
Comments
Powered by Facebook Comments


Thank you
You’re welcome Richard, glad you liked it.
Thanks for your tips and tricks. It is really excellent.
Thank you, I’m glad you liked the post!