Product photography for eCommerce is one of the most important elements of your online business. In short, product photos are the only link your potential customers have to what they are getting and without them, conversion would be almost impossible.
Why? Because when they are top-notch, they play the biggest role in boosting traffic from PPC campaigns and other platforms, keep your traffic engaged on your home and product pages, and ultimately help you convert traffic into sales. Quality photos will grab a potential shopper’s attention, enhance buyer interactions, establish your brand feel and instill trust.
And it’s not just about the product photos you take. The optimization of product photos across every platform and channel plays a huge role in your sales success and branding. Product photography for eCommerce falls under these main categories:
- Product-only photography
- Lifestyle/contextual product photos
- Social media product photos
- PPC campaign product photos
- Website homepage and category product photos
Yet, despite the importance of eCommerce product photography and optimization, so many established online sellers are still not getting it right. This means even if you’re an established store owner, this eCommerce product photography guide is just for you.
In this post, we will discuss in detail everything you need to know about product photography for eCommerce.
We will break down product photos into five main categories, give you all the must-know product photo tips you need to convert, and offer solutions for DIY and outsourcing. Additionally, we will provide all the photo specs you need to ensure your product photos pop on any platform.
Here’s the full list of sections this eCommerce product photography guide will cover in the following 6 steps:
- Choose From the Top Product Photo Types Needed to Run a Successful Online Store
- Create a Product Photography Style Guide
- Must-Know DIY Photography Tips
- Editing and Saving Your Photos for the Web
- Optimizing Your Product Photos for SEO
- How to Make Product Photos the Stars of Your Product Pages
Are you ready to dive into product photography for eCommerce and take your sales to the next level?
Let’s jump in!
Step 1: Choose From the Top Product Photo Types Needed to Run a Successful Online Store
Before you plan your product photo strategies and shoots, it’s vital that you know exactly what type of eCommerce product photography you will need to build a successful online store. Here are the five main types of product photography categories and important image shooting and editing requirements you should consider for each.
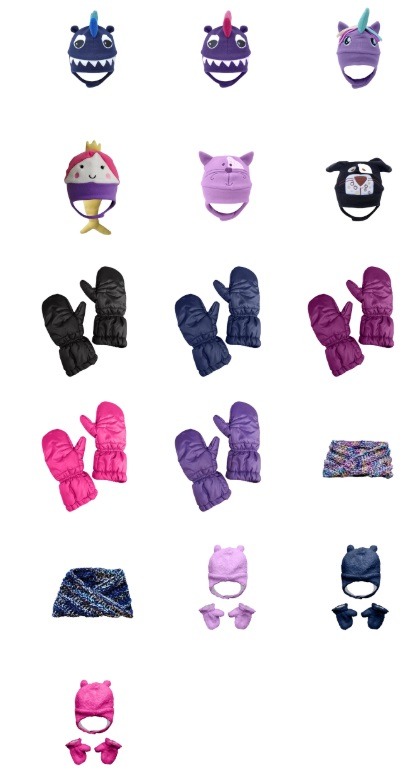
1. Product-Only Photography
The most important type of product photography for eCommerce is your product-only shots. These are those photos you use to really sell your products; they give your potential customers a visual representation of just what they are buying, and are usually on a white background. This makes product-only photos one of the most vital elements of an online business.
Good product-only photos are crisp, high-quality images that highlight every aspect of your product, like the below example from eCommerce superstar Wee Squeak.
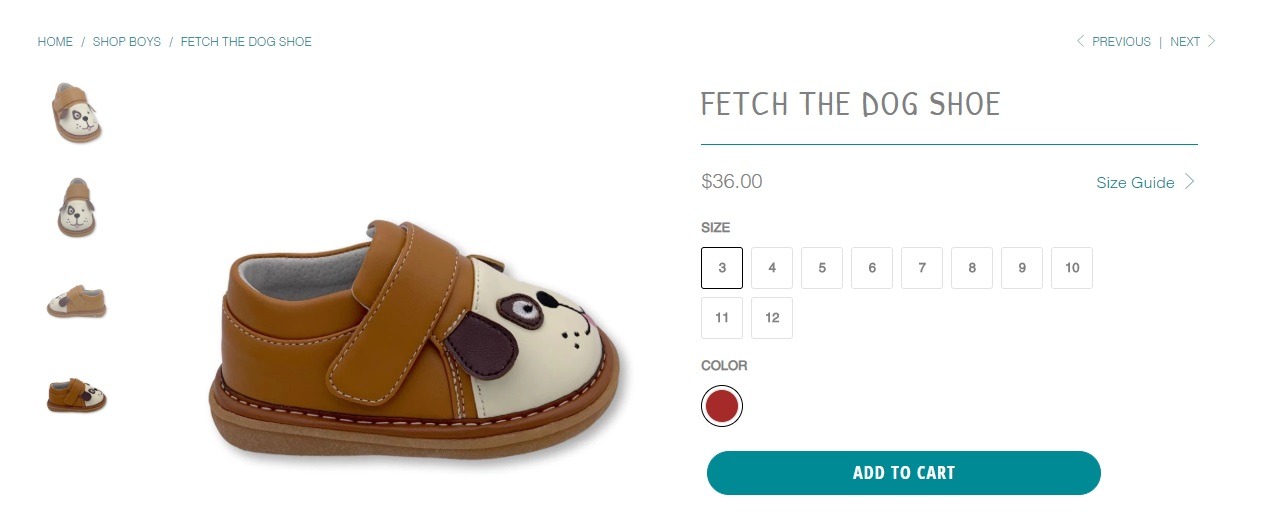
Product-only photos are usually on a white background as this format is required for a lot of platforms, such as Google Shopping. However, there is a trend towards using bright color displays for social, blog content and home pages. Shooting your product-only photos on a white background will allow you to easily edit photos for more creative looks and options.
@storeya.com E-commerce Tip: if you product images are not matching and have different color backgrounds, it’s time to change that up. Here are some easy tools to help you level up product image game! #ecommercetips #entreprenuer #businesshack ♬ original sound – StoreYa.com
Pro Tip: When it comes to product pages and individual product shots, Google evaluates images on best practices, as well as publishing requirements. Therefore, we recommend all product-only photos be shot on a solid white, gray, or light-colored background.
2. Lifestyle/Contextual Product Photos
The second most important product photo type is your lifestyle or contextual product photos. These product photos are intended to tell a story, showing your products being used or worn. Additionally, they don’t just create a vibe for your products – they speak directly to your target audience. Although these types of photos are generally used for social media, blog products and some campaign platforms, there is a trend to incorporate them on home and category pages and more recently, product pages.
Lifestyle product photos for eCommerce will help you demonstrate scale, show off features and fit, and boost your brand’s image.
3. Social Media Product Photography for eCommerce
Unlike the previous product photography for eCommerce types we mentioned, social media content gives you the most creative freedom. This is where you can play with backgrounds and fun lifestyle images, or demonstrate how products are used. But remember: each platform has its own target market and feel, therefore you will want to ensure you shoot and edit your social media product photos to fit the specific platform you plan on using them for.
Why? Because if you want to make sure your product photos pop (i.e., get the reach), you need to reach the target audience of your campaign in a way that delivers: speaks to the target audience of the platform. Here’s a breakdown of each social platform to get you started.
When it comes to Facebook images, impact is super important. As one of the noisiest platforms, it’s super important that your Facebook product images are able to ‘jump out’ from the busyness to reach your potential shoppers. You are also competing very hard with people’s personal posts, so although you want to stay on-brand with stylizing, you also need to grab attention quickly for your campaigns and page content.
Here are some product photography tips for Facebook:
- Stay on top of new trends and image formats so they can be implemented ASAP
- Keep images sharp and impactful
- A/B test images for campaigns
- Use lifestyle photography or colored product backgrounds to stand out
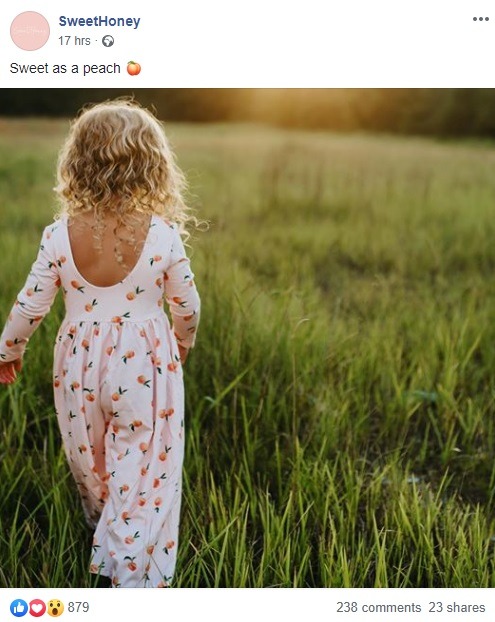
Facebook demographics to keep in mind when creating your images: Generally speaking, Facebook is known to attract fewer millennials than other platforms, with 84% of internet users aged 30-49 said to be active on the platform. Plus, 75% of their users are said to earn $75k per annum.
Unlike its big sister platform, Facebook, with Instagram it is vital that the story you are trying to portray is done 100% visually. From feed posts to Stories, you need to visually attract your users without the help of text like Facebook offers; copy should only be used to enhance the visual in feed posts or help tell your story – quickly – in Stories.
In short, visual style and elegant impact are vital when posting photos on Instagram. Think social media eye-candy!
Here are some product photography tips for Instagram:
- Create eye-catching lifestyle photos or use color to make product photos pop. This is where your UGC strategies can really help you.
- Avoid too much text and headline overlays
- I wouldn’t suggest using your white background product-only photos unless there is something unique about the product – like a funny, unique printed quote.
- Go minimalistic and stay simple.
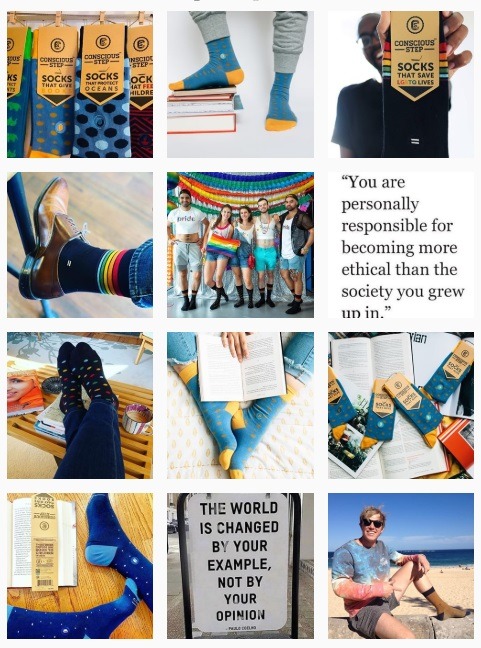
- Keep your feed photos consistent in feel to establish your brand vibe. Create filter profiles, angles and color schemes to reflect your brand and stand out.
A good example of a brand doing all of the above is Conscious Step.
Instagram demographics to keep in mind when creating your images: 75% of Instagram users are under the age of 30, with 83% say they are introduced to new products on Instagram. If your product images pop, you have a better chance of generating 4X more engagements on Instagram than Facebook.
Pinterest product photos will require different dimensions and some more creativity. You want to make sure these images stand out. You need quality images that are not only sized correctly for the platform but styled to match the demographics of the platform.
Pinterest demographics to keep in mind when creating your images: Of the 291 million monthly active users, 79.5% are women. 50% of Pinterest users are millennials, and users tend to use the platform within a specific niche, so make sure your product photos highlight these popular categories. For example, a whopping 70% of Pinterest users search the platform for accessories, watches and jewelry. While 52% of Pinterest users have spent $500+ on beauty products over a six month period.
Snapchat
Lastly, let’s look at the new kid on the block, Snapchat. Unlike other platforms, Snapchat is all about lifestyle images. I am not talking about polished, fashiony images like Instagram; here, people like raw stories that speak directly to them. Additionally, as the users tend to be younger, you want the product images you use here to be loud, bright and in their face. Whether you’re using sponsored lenses or documenting the day-to-day happenings at your warehouses, think fun, emojis, glitter and humor. Here are some eCommerce examples from Gorilla 360.


4. Product Photos for Digital Campaigns
The next product photos you will need to create and optimize your PPC campaign photos. Each marketing channel campaign type has its own requirements that you will need to consider to ensure your campaigns are both accepted by the platform and look good enough to get those clicks. Here’s a breakdown of the top three eCommerce traffic-generating campaign channels.
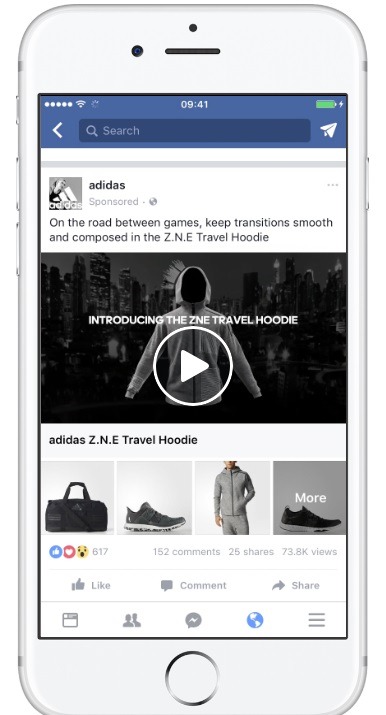
Facebook Campaign Product Image Requirements
With all Facebook campaigns, you need to make sure that any text you use on your images is less than 20%. You will also use a combination of lifestyle and product photos, depending on what type of Facebook ads you are using. Here’s a breakdown of the image specs you should keep in mind as well as an example of a good campaign.
Single Image Ad
The image should be 1080×1080 pixels and clear and concise. You have seconds to make an impact with this photo. Lifestyle, attention-grabbing product photos work best here.

Facebook Story Ads
The image should be 1,080×1,920 pixels and tell a story in an engaging way. Lifestyle, attention-grabbing product photos also work best here.
Facebook Carousel Ads
The image should be 1,080×1,080 pixels and tell a story in an engaging way. Here, you can use a combination of product photos or different photos to highlight a single product’s features. You can add up to five photos here, so you have room to get a little creative.

Here your images shouldn’t be no less than 400×150 pixels and can highlight one product and its features or a variety of products. Therefore, you can test one lifestyle photo or video with a few product-only photographs to find the combination that works best for you.
Facebook Audience Network
Here, your product images should be 1,200×628 pixels and high-quality and crisp to stand out.

Facebook Messenger Ads
The product images you use for these depends on the type of messenger add you are running.
- Messenger stories should be a minimum 90×160 pixels
- Sponsored messengers aim for 1,200 x 628 pixels
- Messenger inbox should be no less than 254 pixels wide and 133 pixels long
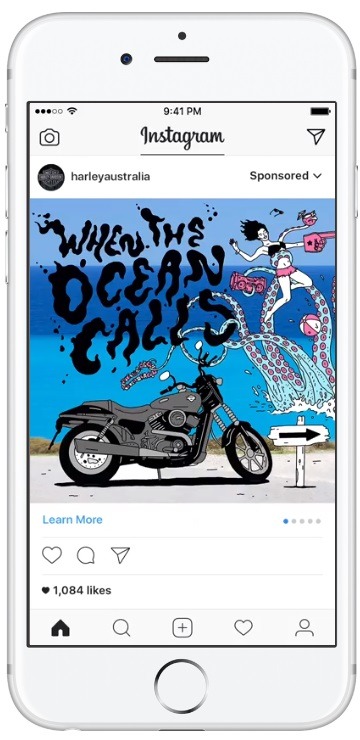
Instagram Campaign Product Image Requirements
As we mentioned, Instagram photo posts should be minimalist, stylish and impactful. This goes for your Instagram campaign product photos as well! Here are image spec suggestions for some top Instagram ad types and examples of how to use them.
Landscape Image Ads
These product images should be 1,200×628 pixels and super impactful to grab your potential shoppers’ attention.

Instagram Story Image Ads
With stories, you have seconds to get engagement. By combining a good-quality image of 1,080×1,920 pixels with some clever text, you could win big time.

[source]
Also, don’t forget to use them with GIFs and emojis to turn picture stories into video glam.

Instagram Carousel Image Ads
Here, you have more than one type of image of 1,080×1,080 pixels to grab attention. Start off with a strong lifestyle image, followed by lifestyle or product-only shots.
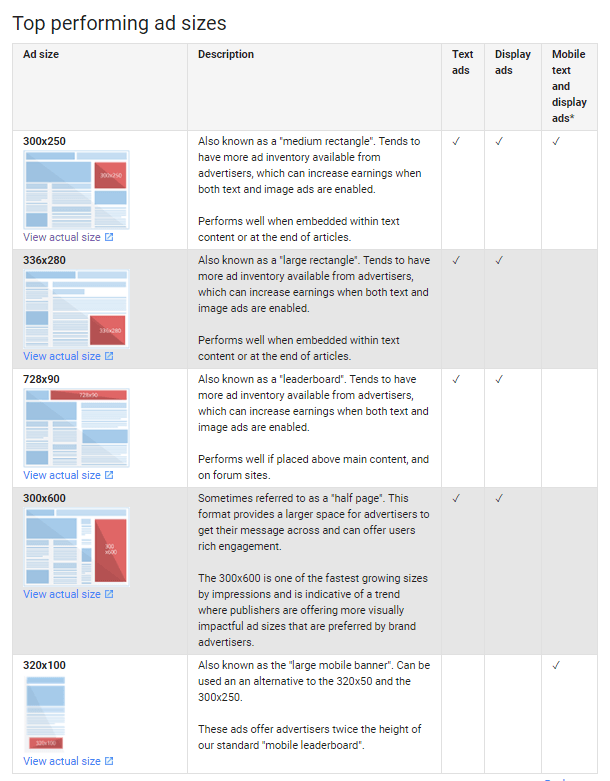
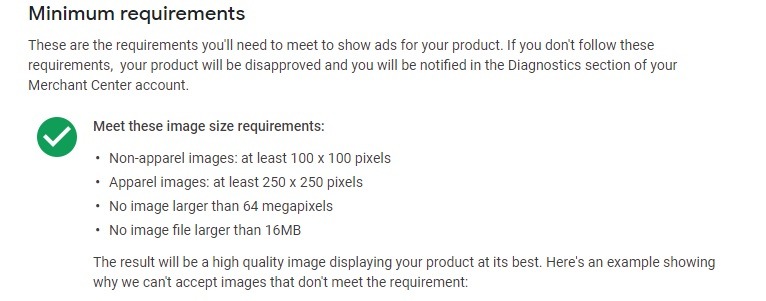
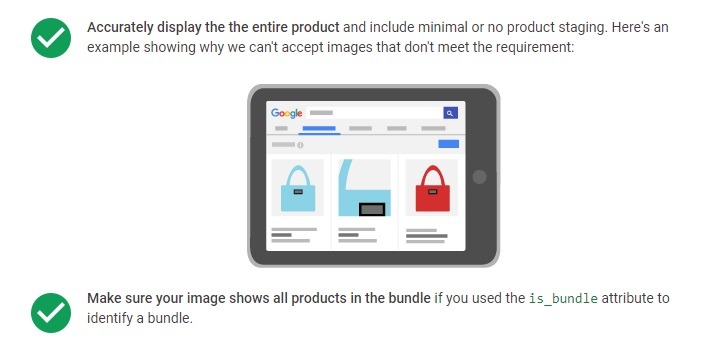
Google Campaign Product Image Requirements
When it comes to Google campaigns, it isn’t just the dimensions and feel of the photo you need to consider. Certain ads will require specific product photo types to ensure you can run campaigns. Here’s a list of each image ad type and dimension requirements:
Google Display Ads
Google Shopping
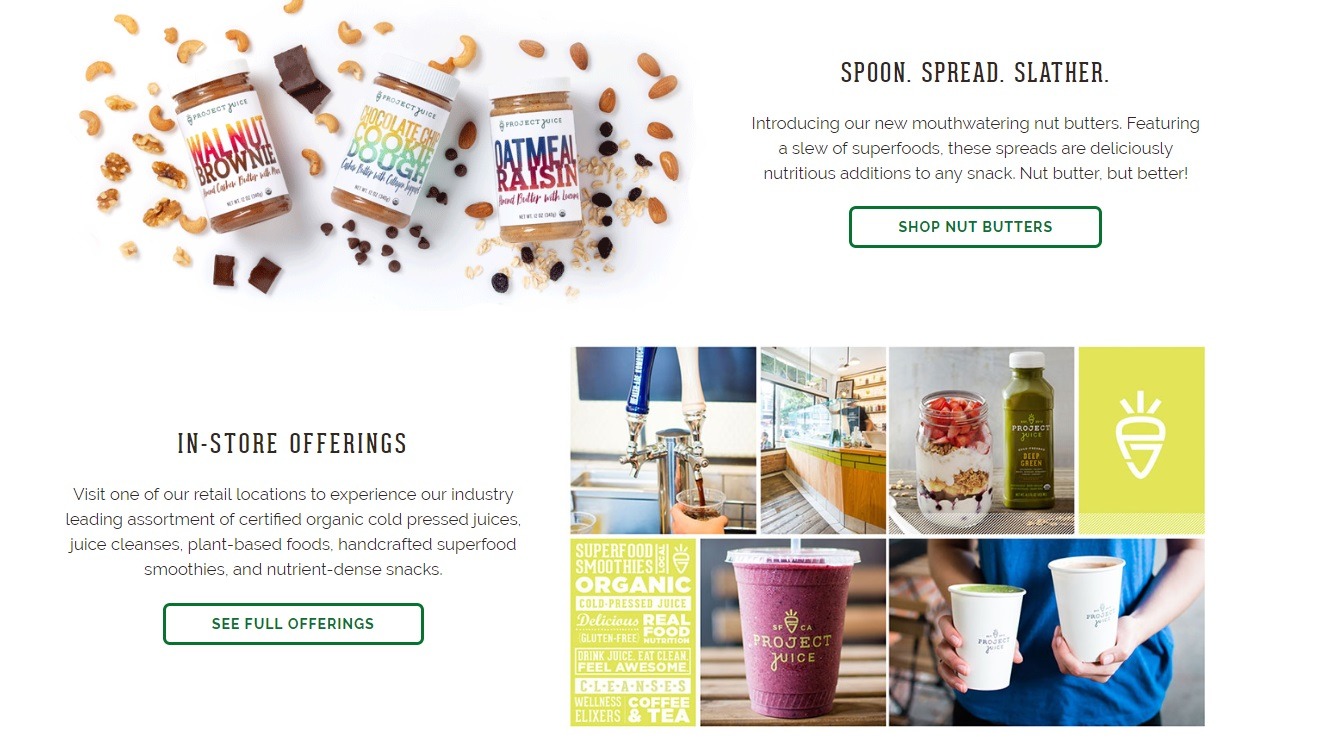
5. Website Homepage and Category Product Photos
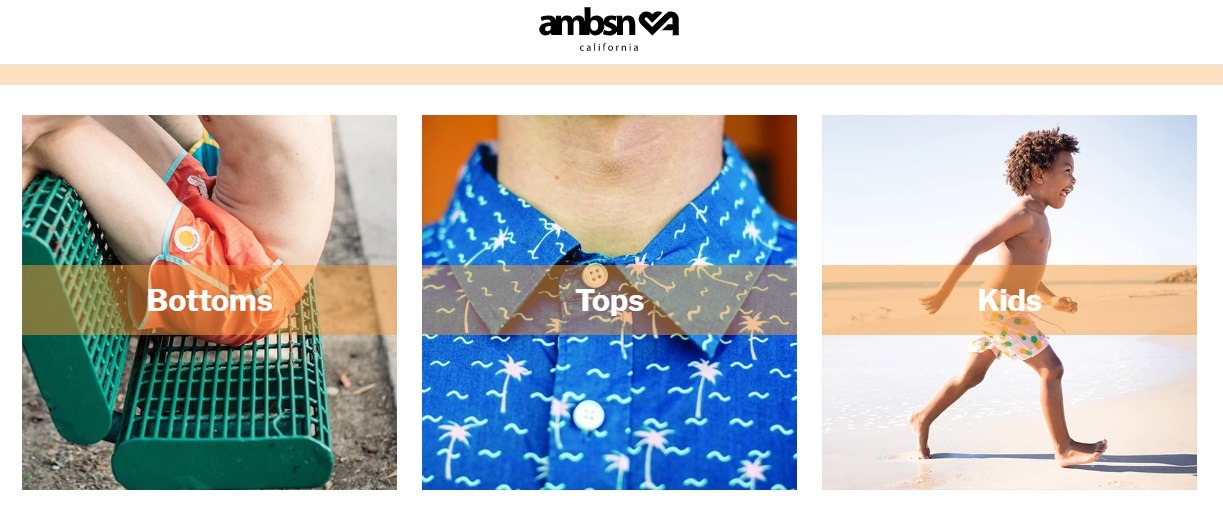
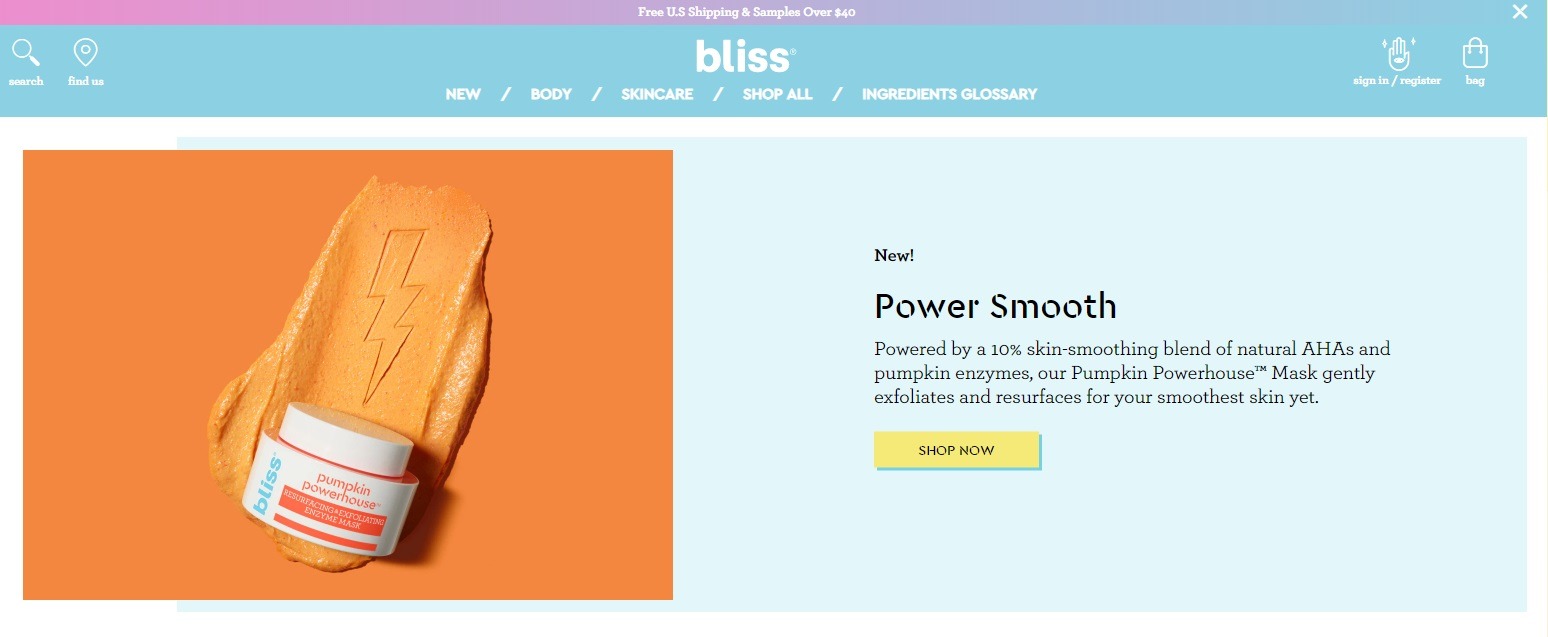
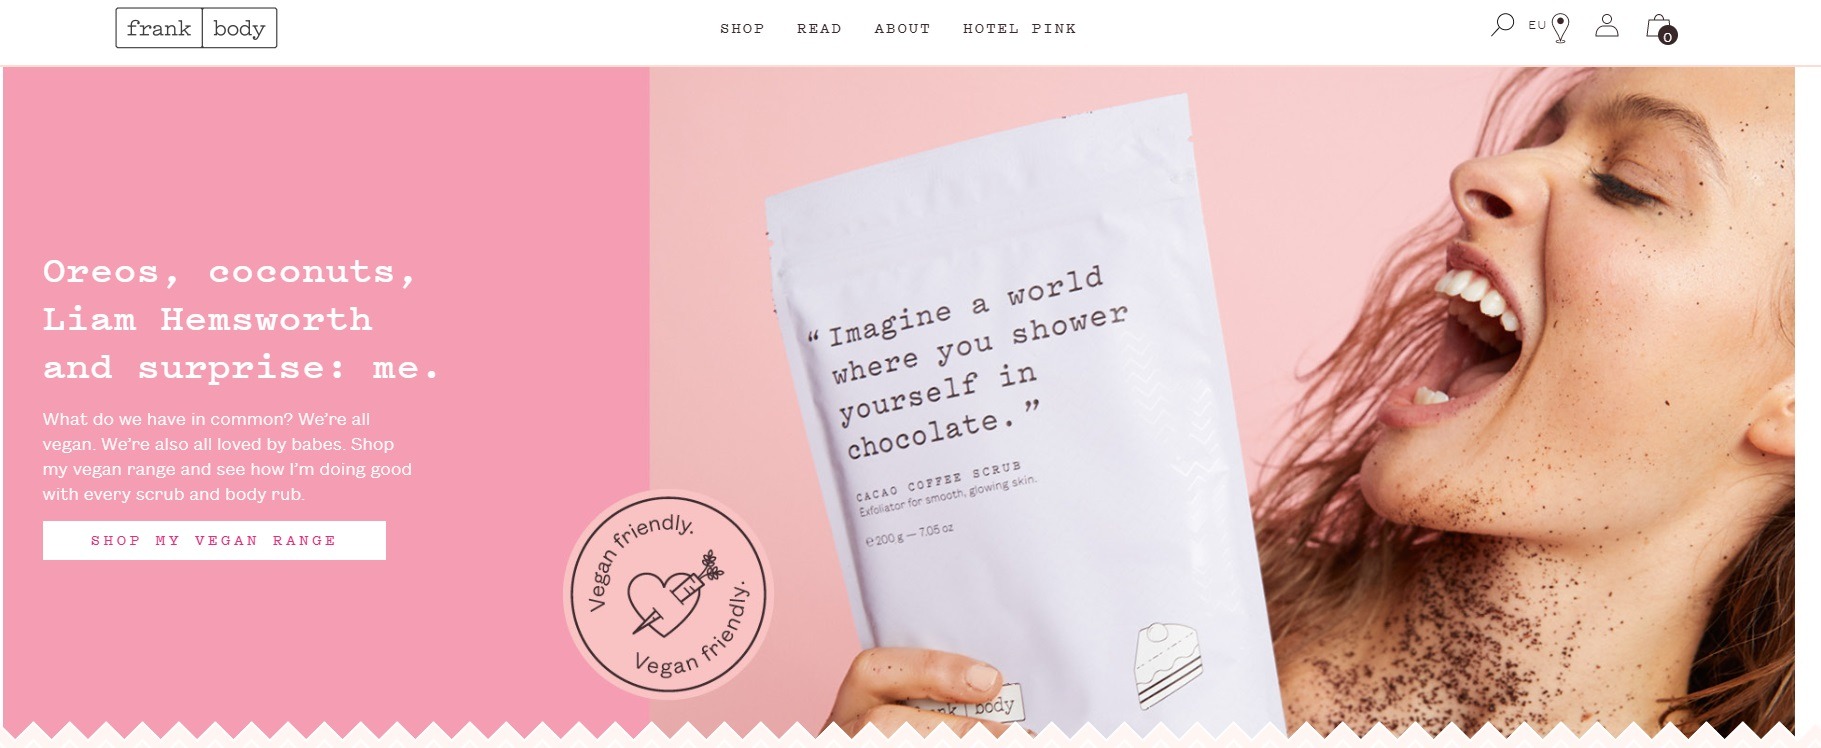
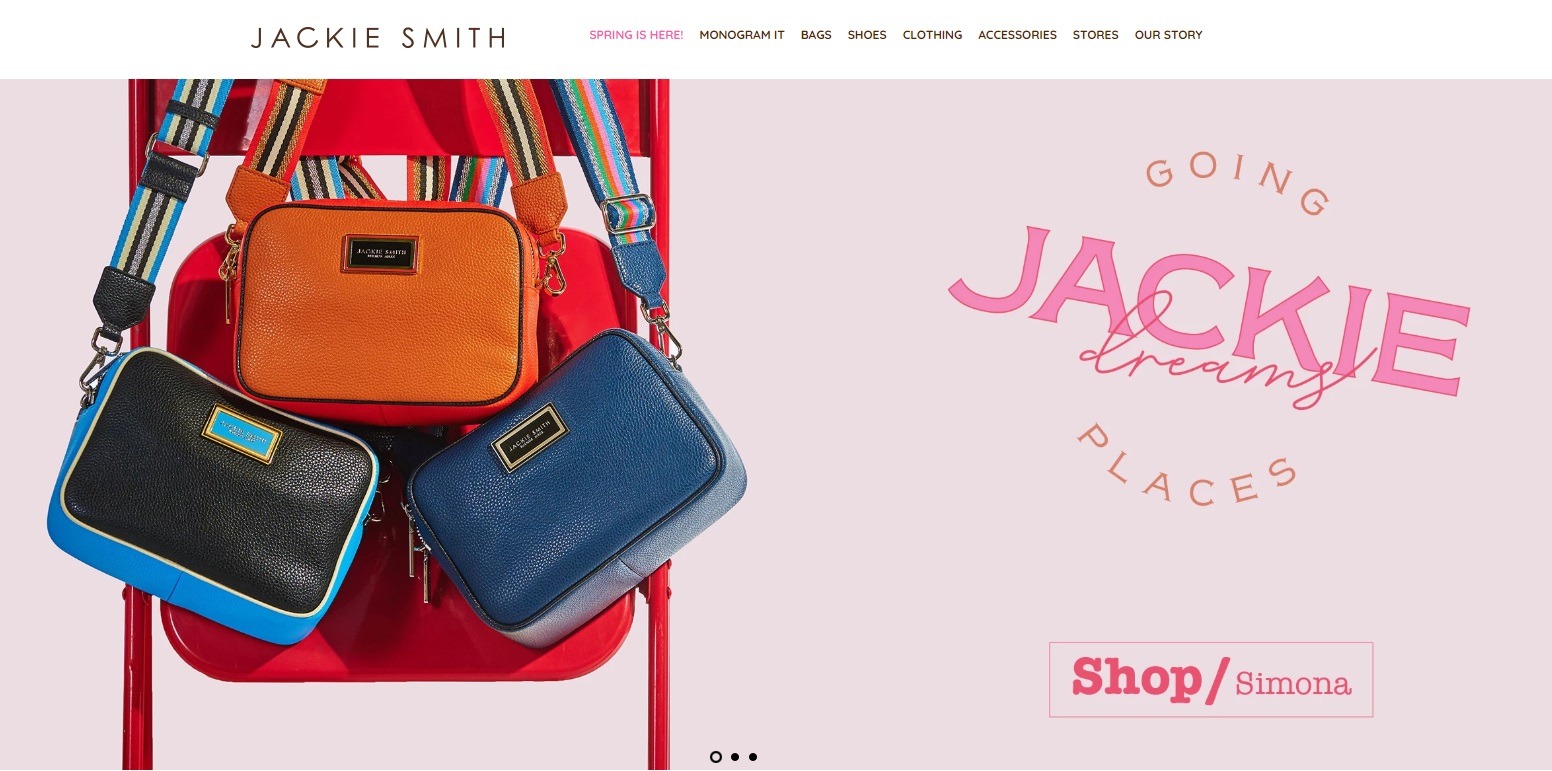
Lastly, let’s talk about eCommerce product photos for your website and category pages. Although these will probably be made up lifestyle and product-only photos, to really stand out, some uniqueness and variety here could put you over the edge and help keep that traffic on your site. Here are some home page examples to inspire you to take your product photos to the next level.
Ambsn
Bliss
Frank Body
Jackie Smith
Thing Industries

Step 2: Create a Product Photography Style Guide (and Why You Need One)
Before you get into product photography mode, you need a clear plan. This is where a photography for eCommerce style guide will come in handy. Whether you are shooting your own photos or outsourcing to an eCommerce photography service, a style guide will help set the standard for your product photos and keep them consistent. This includes anything from camera settings to editing specs and the product’s distance from the camera.
In short, a product photography style guide acts as a template for all your product photos to ensure they match in aspect, editing, look and feel. And why is this so important? Because a lot of your eCommerce vibe comes from your product photos; and when it comes to online business, your photos are the biggest impact you can make. Additionally, a template will also streamline your product photography process, making it quicker and more efficient. Here are some key points or settings your eCommerce product photography style guide should include.
eCommerce Photography Style Guide
1. Photo Mix Strategy
The first thing you want to do is establish your product photography strategy. Decide on the types of product photos you want as well as the composition, layout, styles, etc. of each. You will then create a list of guidelines to help you repeat the same look and feel from product to product.
2. Set Your Color Palettes
When creating your product photography style guide, choosing and setting your color palette should be your first step. In fact, you want to be aware of this before you take a single photograph. Why? Because your color schemes should work with your brand. Let’s just say you have started an online clothing store that sells women’s clothing and your branding is all soft pastel pinks, greens and yellows. Adding bright, loud colors to your product photos would then be off-brand. You will, of course, also want to be sure your palette doesn’t clash with your products.

Here are just some of the color or texture palettes you could choose other than white backgrounds:
- Patterns
- Earth tones
- Wood textures
- Contrasting colors
- Neutral colors
- Marble
But remember: you can also shoot on white and then change background colors after. Plus, when it comes to producing color palettes for your lifestyle, social and web banner photos you will have a more creative wiggle room.
3. Composition Guidelines
When it comes to product-only photos, you want to keep the composition standard and uniform. Not only does this help build brand identity but it will make it easier on shoppers’ eyes. You want to be consistent with things like the amount of negative space you are using, the angles you take and the positioning of your products. It is important to set this early on so that you keep this consistent as your product lists grow.
4. Content Guidelines
Not only do you need to stylize your website product photos, but also your blog, social and email marketing product photos to ensure they match your brand while still talking to your target shopper.
5. Focal Length Guidelines
Another important setting is the focal length of your guidelines. If you want to keep your product photos consistent, you need to make sure your focal is constant as this will affect the composition and focus of your photos. In short, you want to use the same lens and camera settings for all your photos so that they all have the same focus, quality and look.
Bonus Tip: Not familiar with focal length? Check out this five-minute video:
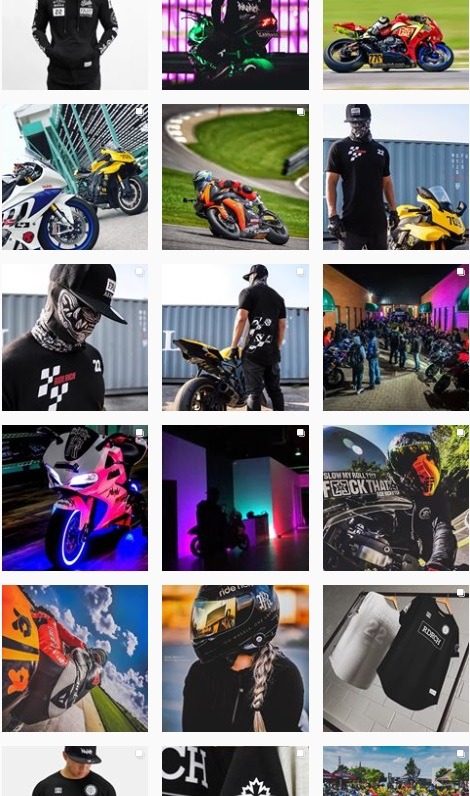
6. Location and Context Guidelines
When it comes to shooting or briefing your agency for your lifestyle photos, the context of your photos is important. Here’s an example from Ride Rich, showing perfect context for their products.
7. Saturation Guidelines
Another important style guide point for your eCommerce product photos is your saturation settings. If this is not standardized, it will make your store look less professional as a whole. You want to make sure your colors ‘speak’ to your audience, and do so consistently.
8. Shadow Guidelines
Lastly, if you are using shadows in your product photos, you want to ensure you create a styling guide for them. This will ensure the occupancy, size and placement of your shadows match throughout.
9. Use the Same Camera Settings (DIY)
If you’re shooting your own eCommerce product photos, you want to make sure that you use the same camera and equipment settings for all of your photos. This includes:
- Aperture
- Lighting settings
- Shutter speed
- Tripod height and distance from subject
- White balance
- Product height
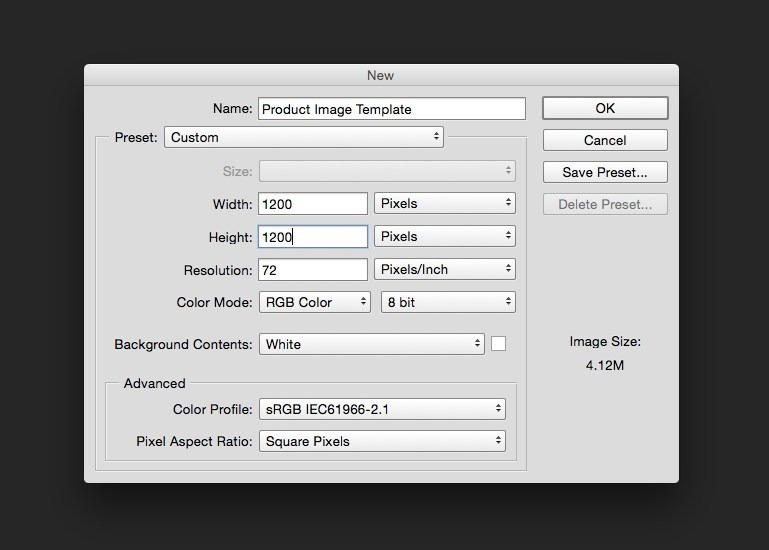
Creating Product Photo Templates in Photoshop
Once you have set your types, angles, styles and compositions, it’s important that you edit the photos in the same way. The easiest way to do this is by creating a product photo template in Photoshop. Here is a step-by-step guide from Pixc.
- Create your product photo file
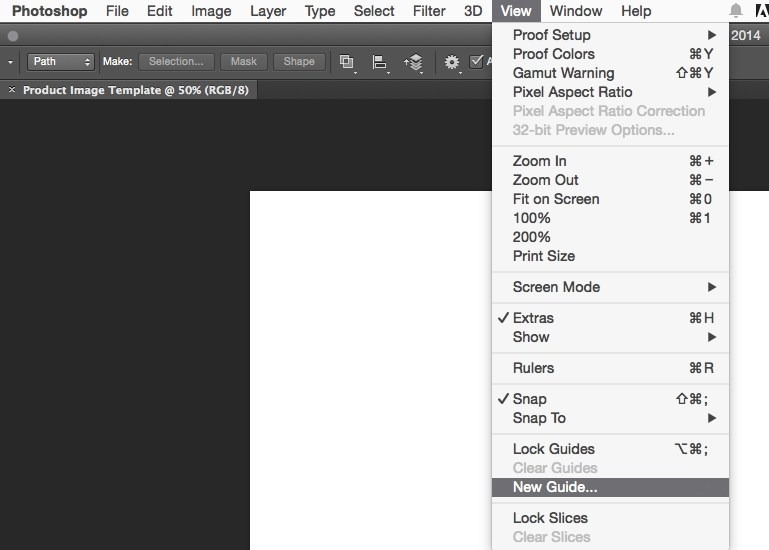
2. Set your outer vertical and horizontal guides
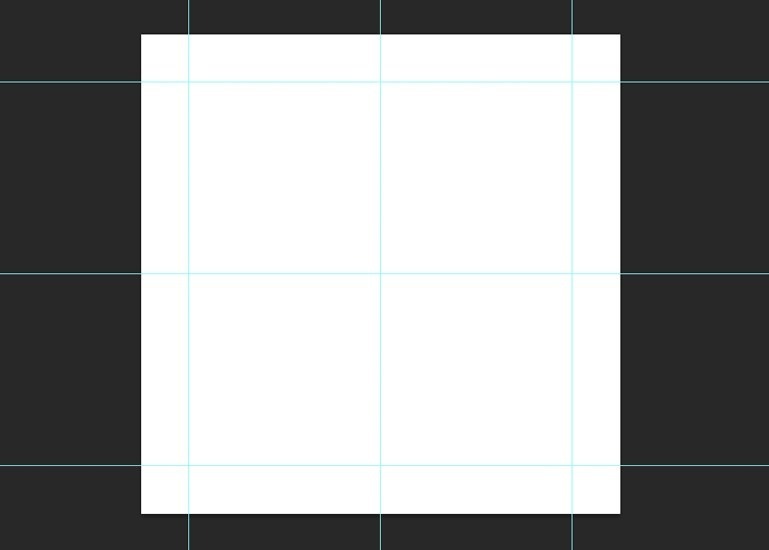
3. Set your inner guidelines – save this as your template
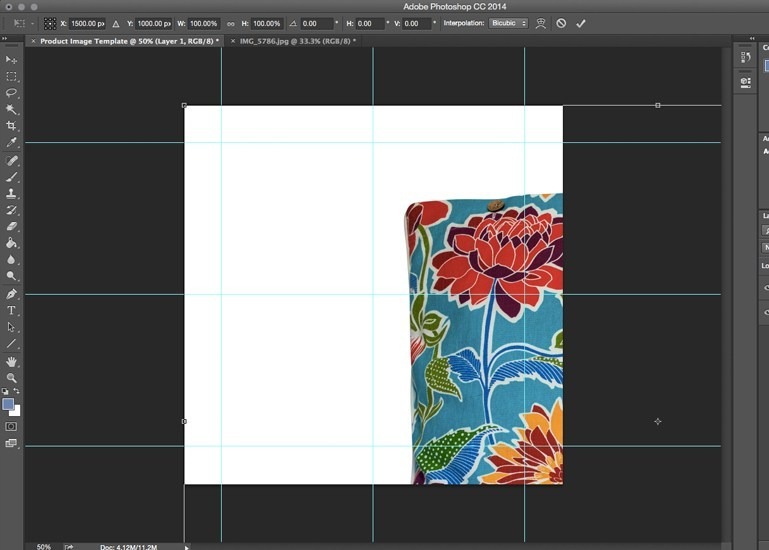
4. Insert and center your product so it fits into your template
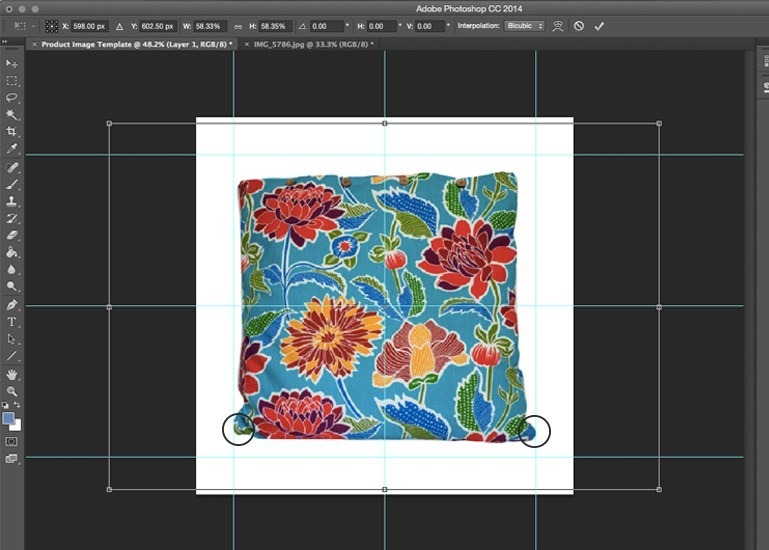
5. Save the image
Step 3: Must-Know DIY Product Photography Tips
1. Use a Tripod
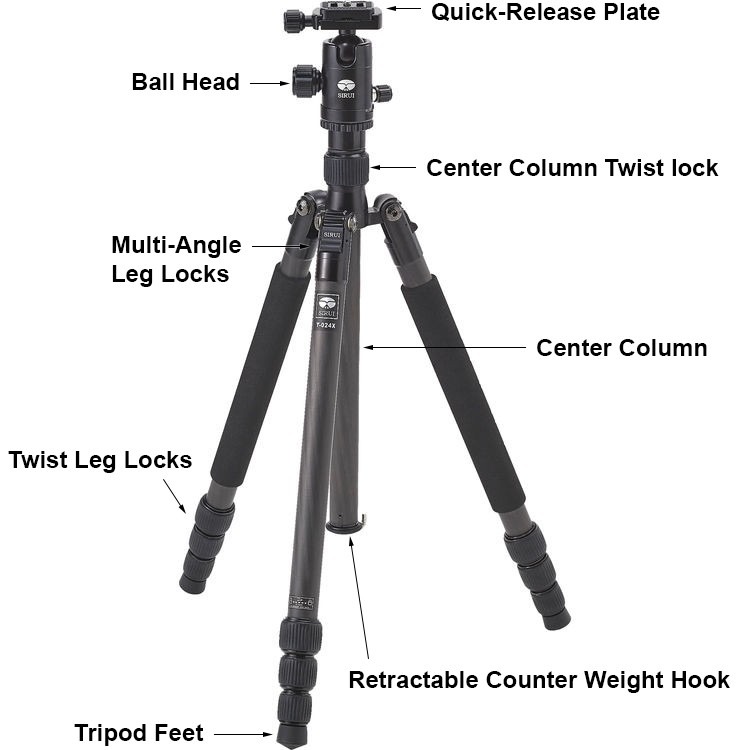
One of the most important pieces of equipment for DIY eCommerce product photography is your tripod. In fact, you should not be shooting your product photos without one.
Why? Because without it, you won’t be able to standardize the quality and precision of your photos. A tripod will ensure your camera is stabilized, preventing blur from shaky hands, and enable you to keep the camera at one consistent height – both critical to the quality of your product photos. And the best part? As camera equipment goes, they aren’t that expensive.
If you’re looking for a tripod, here are some things to consider when choosing one:
Head
Tripods come with three main head types: pan-tilt, ball or gimbal. As product-only photography requires less camera movement, you would do well with a pan-tilt. I would only recommend a gimbal if you’re working with larger 300mm+ lenses.
Centerpost
A centerpost is that leg in the middle of your tripod. It is a handy feature as it will enable you to adjust the height of your tripod by simply moving it up and down. However, it’s a feature you can do without for product photography as you shouldn’t need to keep adjusting this.
Height
To avoid having to keep bending to see through your camera viewfinder, I suggest investing in a tripod that matches your height in standing position.
Legs
Tripods are either tubular or non-tubular and the more sections they have the taller the tripod will be. But bear in mind, the taller the tripod the less stable it will be.
Stability
Despite popular belief, a heavier tripod doesn’t necessarily mean it is more stable. You will want to look for reviews that point to a tripod known for its balance.
[Source]
2. Pick the Right Camera
Although you can shoot product photos with a smartphone, I highly recommend that you aim to invest in a good DSLR or mirrorless camera if you plan on continuing to DIY your product photos. You want to choose a camera that has the following features:
- Removable lenses
- Manual mode
- Video capabilities
- Significant amount of megapixels
- Autofocus
- A good color spectrum
Here are some suggestions on the best product photography cameras from Fix the Photo.
Camera Setting Pro Tip: When shooting product photos, you want to make sure that you don’t distort your images, therefore you don’t want to use a wide-angle lens. Additionally, to keep your product in focus, you want to select an aperture with a wider depth of field, so use f8 or f11 for crisper focus. Use the right white balance to match your lighting.
3. Know Your Lighting
Once you have your camera and tripod set up, it’s time to adjust your lighting. Remember: a white background without efficient lighting won’t appear white in the photo. When it comes to product photography for eCommerce, you have two lighting options: studio and natural. Studio lighting is perfect for your product-only shots on a white background, while natural lighting is good for natural lifestyle product photos for social contexts, etc. For studio lighting, you will need to invest in a light box or tent, and lights and bulbs. You can read more about this and all the equipment you need for DIY product photography in full detail, here.
4. Vary Your Angles
Lastly, don’t forget to show every angle or feature of your product. The more angles you have, the better the chance a potential shopper will get the full picture of what they would be buying. Don’t be afraid to get creative with moving your product around to find that sweet spot. And also don’t forget those close-ups!
New to product photography? If you are a brand new online seller with zero experience who has decided to take your own product photos, you may want to jump to the full guide to white background product photography. To get you started, here’s a list of DIY product photography must-have equipment:
-
Your style guide
-
Camera
-
Light tent
-
Shooting table
-
Studio light
-
Tripod
-
Image editing tools
Step 4: Editing and Saving Your Product Photos for the Web
The next step in mastering product photography for eCommerce is your photo editing. Post-processing is an important step in ensuring your photos are perfect. This includes background editing, shadowing, color correction and more. To do this, you will need to choose photo editing software. Here are some top product photo editing tools:
Bonus Content: For more on these tools and other services, here’s a list of 28+ global photography services, marketplaces, platforms and tools for eCommerce.
And what are the most important edits you should be making to your product photos? Here is a checklist of product photography edits and saving steps to ensure quality photos:
- Edit out the background to create a uniform look and feel. For a step-by-step guide on how to do this, click here.
- Correct photo color to ensure your product colors look as close to the real thing as possible.
- Create copies of your photos in the correct dimensions for the platform you’re loading them to.
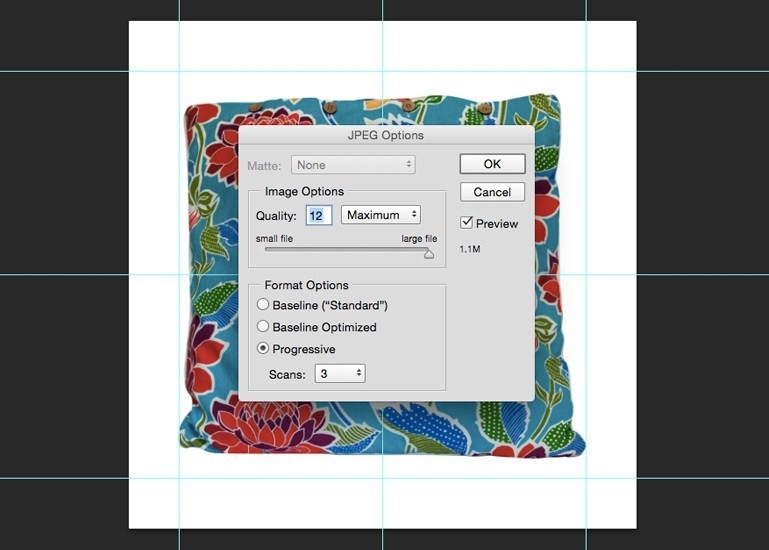
- Save your product photos in the right format: JPG, PNG, GIF, etc.
- Resize your images for mobile to ensure that your products look crystal clear on all devices.
Step 5: Optimize Your Product Photos for SEO
Another important step when talking about product photography for eCommerce is image SEO optimization. Not only do you want to save photos to ensure you are not harming your load times, but you will have a better chance of conversion. To optimize your product photos for SEO, you will need to do the following:
1. Correctly Naming Images
When you save your product photos, the name you save them under is very important. You want to avoid numbers-only naming. Instead, be clear and define in words what product the picture depicts. In short, you want to tell Google what is in the image and use your product keyword.
Pro Tip: Use hyphens instead of spaces to separate words to improve algorithm readability.
2. Minify Your Images
Next, before uploading your product photos to your site, a campaign or social accounts, you want to compress your images without sacrificing quality. The term for this is minifying and it will enable you to keep your load speeds without ruining your photos. If you have a Shopify store, Shopify will automatically do this. But if you’re on another eCommerce platform you will need to do this yourself.
Bonus Tip: Measure your technical performance, shopping experience, trustworthiness and marketing effectiveness with the free Benchmark app.
3. Add Alt Text to Every Product Photo
After you have compressed and uploaded your product photos, you want to ensure that you have given each image alt text. If you’re using Shopify, you can do this from the Shopify dashboard. Here are four tips to help you create product photo alt text correctly:
- Only use alt text for product images, not decorative images
- Use model or serial numbers, if you use them, in your alt attributes
- Don’t keyword stuff
- Use simple language to describe what is in your photo
4. Test, Test, Test
Like with every aspect of eCommerce, you want to look at your traffic data to see which images are performing and tweak the ones that aren’t. You should also be testing your main product images and home page product shots to find the ones that perform best in terms of traffic and conversions.
Step 6: How to Make Product Photos the Stars of Your Product Pages
The last important step of winning at eCommerce product photography is ensuring that your product pages work for you, not against you. This means having product pages that make your products (and their photos) the stars of your product pages. Of course, you also want to ensure your product pages are optimized for success.
Every product page should have a title and overview, a featured product image, a selection of different product photos that highlight different angles or features, a product description, reviews and ratings, a buy button that grabs attention, and links to related products and other info.
When it comes to optimizing your product pages to make your products pop, here are some top must-dos:
- Optimize product copy to ensure it speaks to both humans and bots
- Use your most impactful product photos and make sure they are optimized
- Make all pages uniform and optimized for conversions
Here’s a step-by-step guide to creating product pages that convert like nobody’s business.
—
There you have it, everything you need to know to win at product photography for eCommerce. Looking for more product photography tips? Click through to these guides:
- Your Full Guide to White Background Product Photography
- How To Remove Image Backgrounds Without Photoshop
- 28+ Global Photography Services, Marketplaces, Platforms and Tools for eCommerce
- 9 Tools You Can Use to Edit Your Own Product Photos
- How to Take Amazing Product Photos With Your Smartphone

Nicole is a content writer with over sixteen years experience and flair for storytelling. She runs on a healthy dose of caffeine and enthusiasm. When she's not researching the next content trend or creating business content strategies, she's an avid beachgoer, coffee shop junkie and hangs out on LinkedIn.
Recommended articles
 Facebook Ads for eCommerce: 16 Strategies, Examples & Tips
 How to Build a Winning eCommerce Ads Strategy
 Google Ads for eCommerce: Everything You Need to Know
 10X Your Traffic with PPC Management Software
Comments
Powered by Facebook Comments